What you can do in Studio
Use Studio when you want to:- describe a feature in natural language and have an agent build it
- work against a live preview of your frontend as it’s being changed
- review the resulting files and repository state before committing
- iterate fast on frontend work without leaving Frontic
Jobs and workspaces
Every task in Studio is a job — a named unit of work that lives on the Board. Each job has its own workspace: sandbox infrastructure running your code, plus a live preview, chat, and change review scoped to that one job. You create a job to start something; everything related to that something lives together in one workspace until you archive the job — at which point the sandbox is torn down but the chat is preserved for replay if you ever unarchive. Typical jobs:- “Build a product detail page that uses the new variant picker”
- “Add a category filter to the existing product listing”
- “Migrate the homepage hero to the new design”
- “Fix the 404 handling on the category pages”
- “Rebuild the footer navigation with the new menu structure”
One job per meaningful task
The default Studio workflow is one job per meaningful task — not one per line of code, but not one per month either. A good rule of thumb:- Small tasks (a CSS tweak, fixing one label) can share a job if they’re related
- Medium tasks (a new feature, a refactor, a migration) each get their own job
- Large tasks that touch multiple unrelated areas get split into multiple jobs, one per area
Creating a job
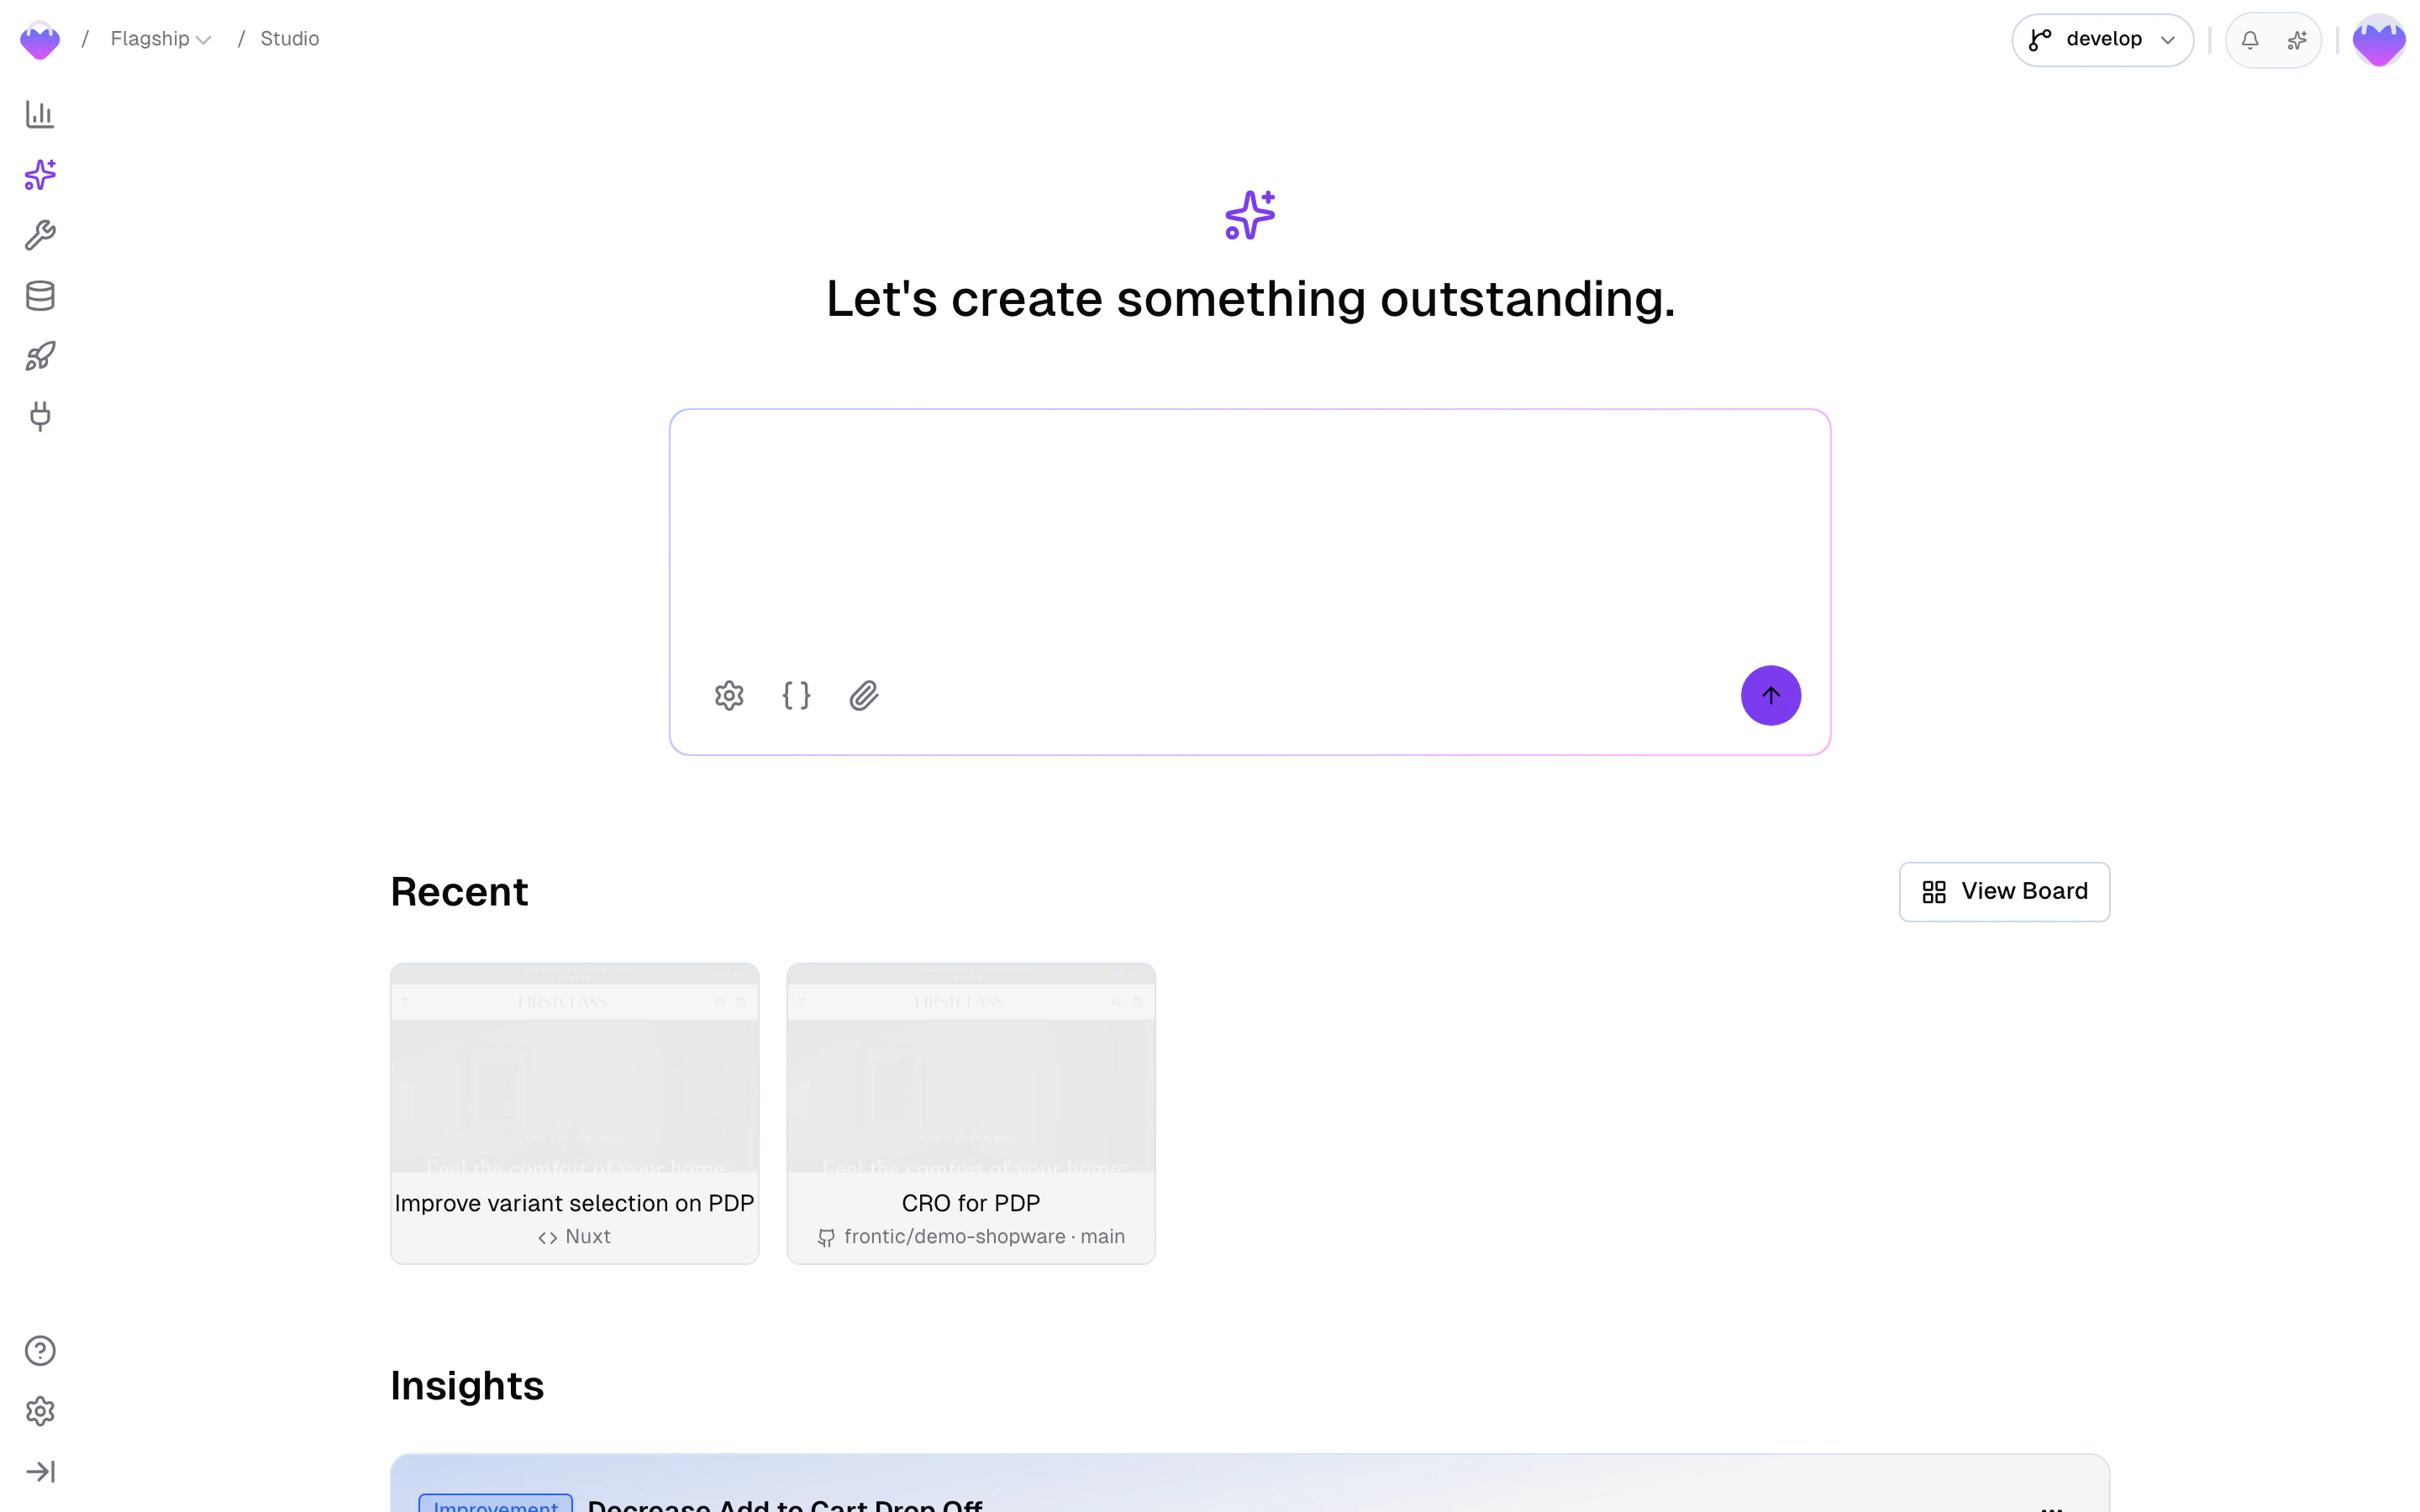
Three ways to start one:From the Studio landing page
Type your initial prompt in the Studio landing page — Studio spins
up a job around it with defaults pulled from your project settings.
From the Board
Click Add Job on Studio → Board, name the
job, and adjust the source if you need to. Source is pre-configured
based on your GitHub connection.
From Buddy
Ask Buddy to hand off to Studio mid-conversation.
Buddy creates the job with context and a starting prompt drawn from
what you were discussing.
The Board
Studio → Board is where you see all your jobs — active, in review, shipped, archived. Click any job to reopen its workspace; chat history, current preview state, and branch state all come back.
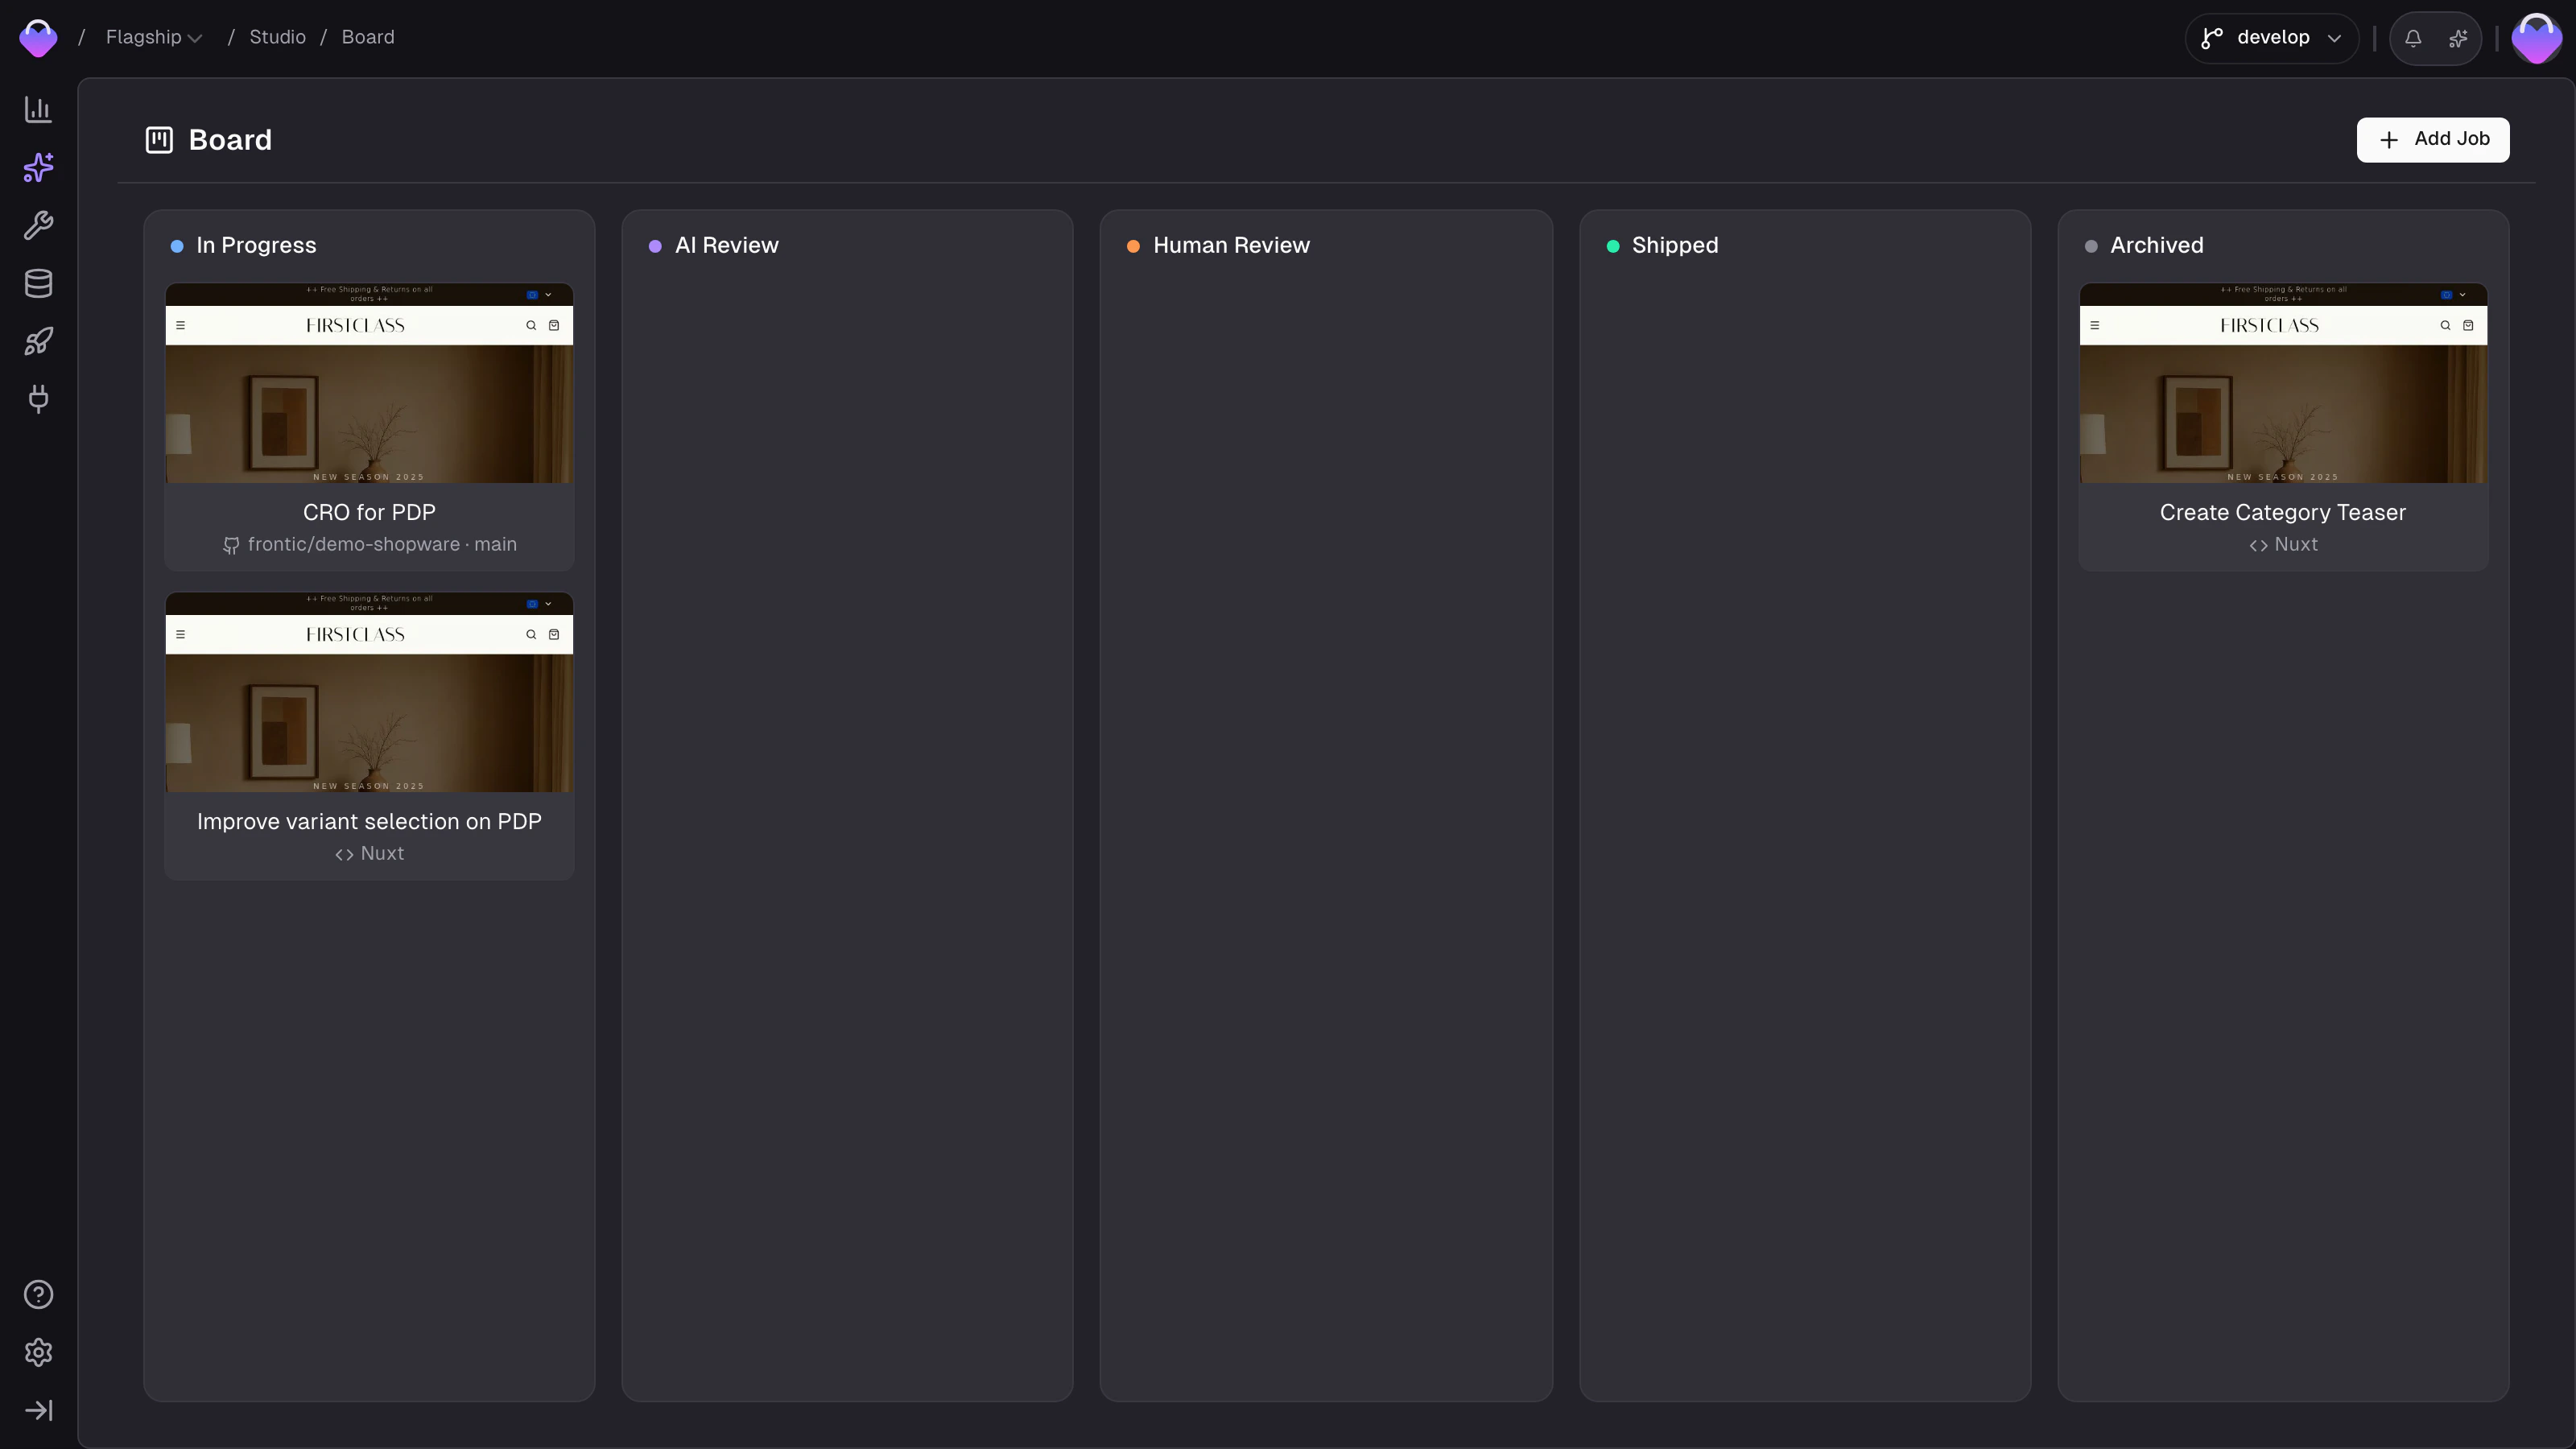
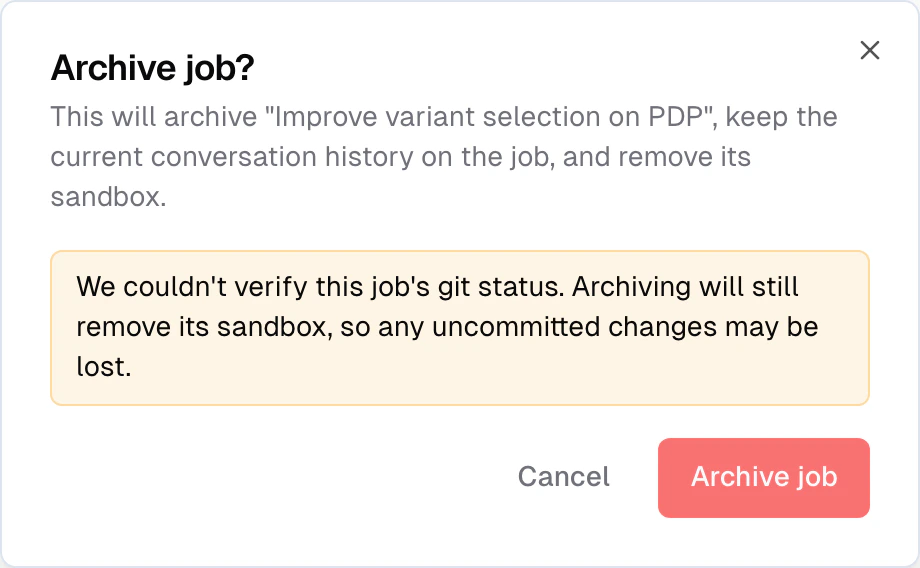
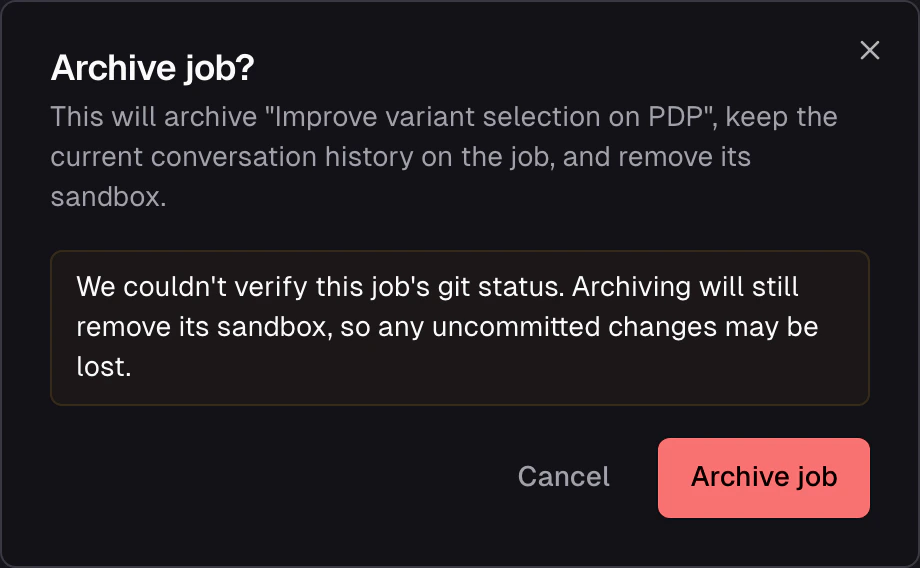
Archiving a job
Once a job is done — or paused indefinitely — archive it from the⋯ menu on its Board card. Archiving keeps the conversation transcript on the job but tears down the sandbox: the running dev server, the preview, and the workspace files all go away. The card moves to the Archived column and can no longer be opened directly.
Unarchive from the same ⋯ menu when you want to pick the work back up. Studio rebuilds a fresh workspace at the same base branch and replays the saved chat history into it, so you land back in the job with the conversation intact.
Todo list
Work in Studio rarely fits in one round-trip. The agent breaks larger tasks into a checklist — search the codebase, edit a few files, verify in the preview, fix what broke — and the chat surface shows that checklist as a Todo List panel above the message input. While the agent works, you see the steps tick over: each step shows its status (pending, in progress, completed) and a counter at the top tracks overall progress (e.g.2/5 Completed). The active step’s description sits right at the panel’s edge so you always know what the agent is doing right now.
This isn’t a separate tool you invoke — it surfaces automatically whenever the agent organises its work into more than one step. The panel collapses out of the way once everything’s done.
Plan mode
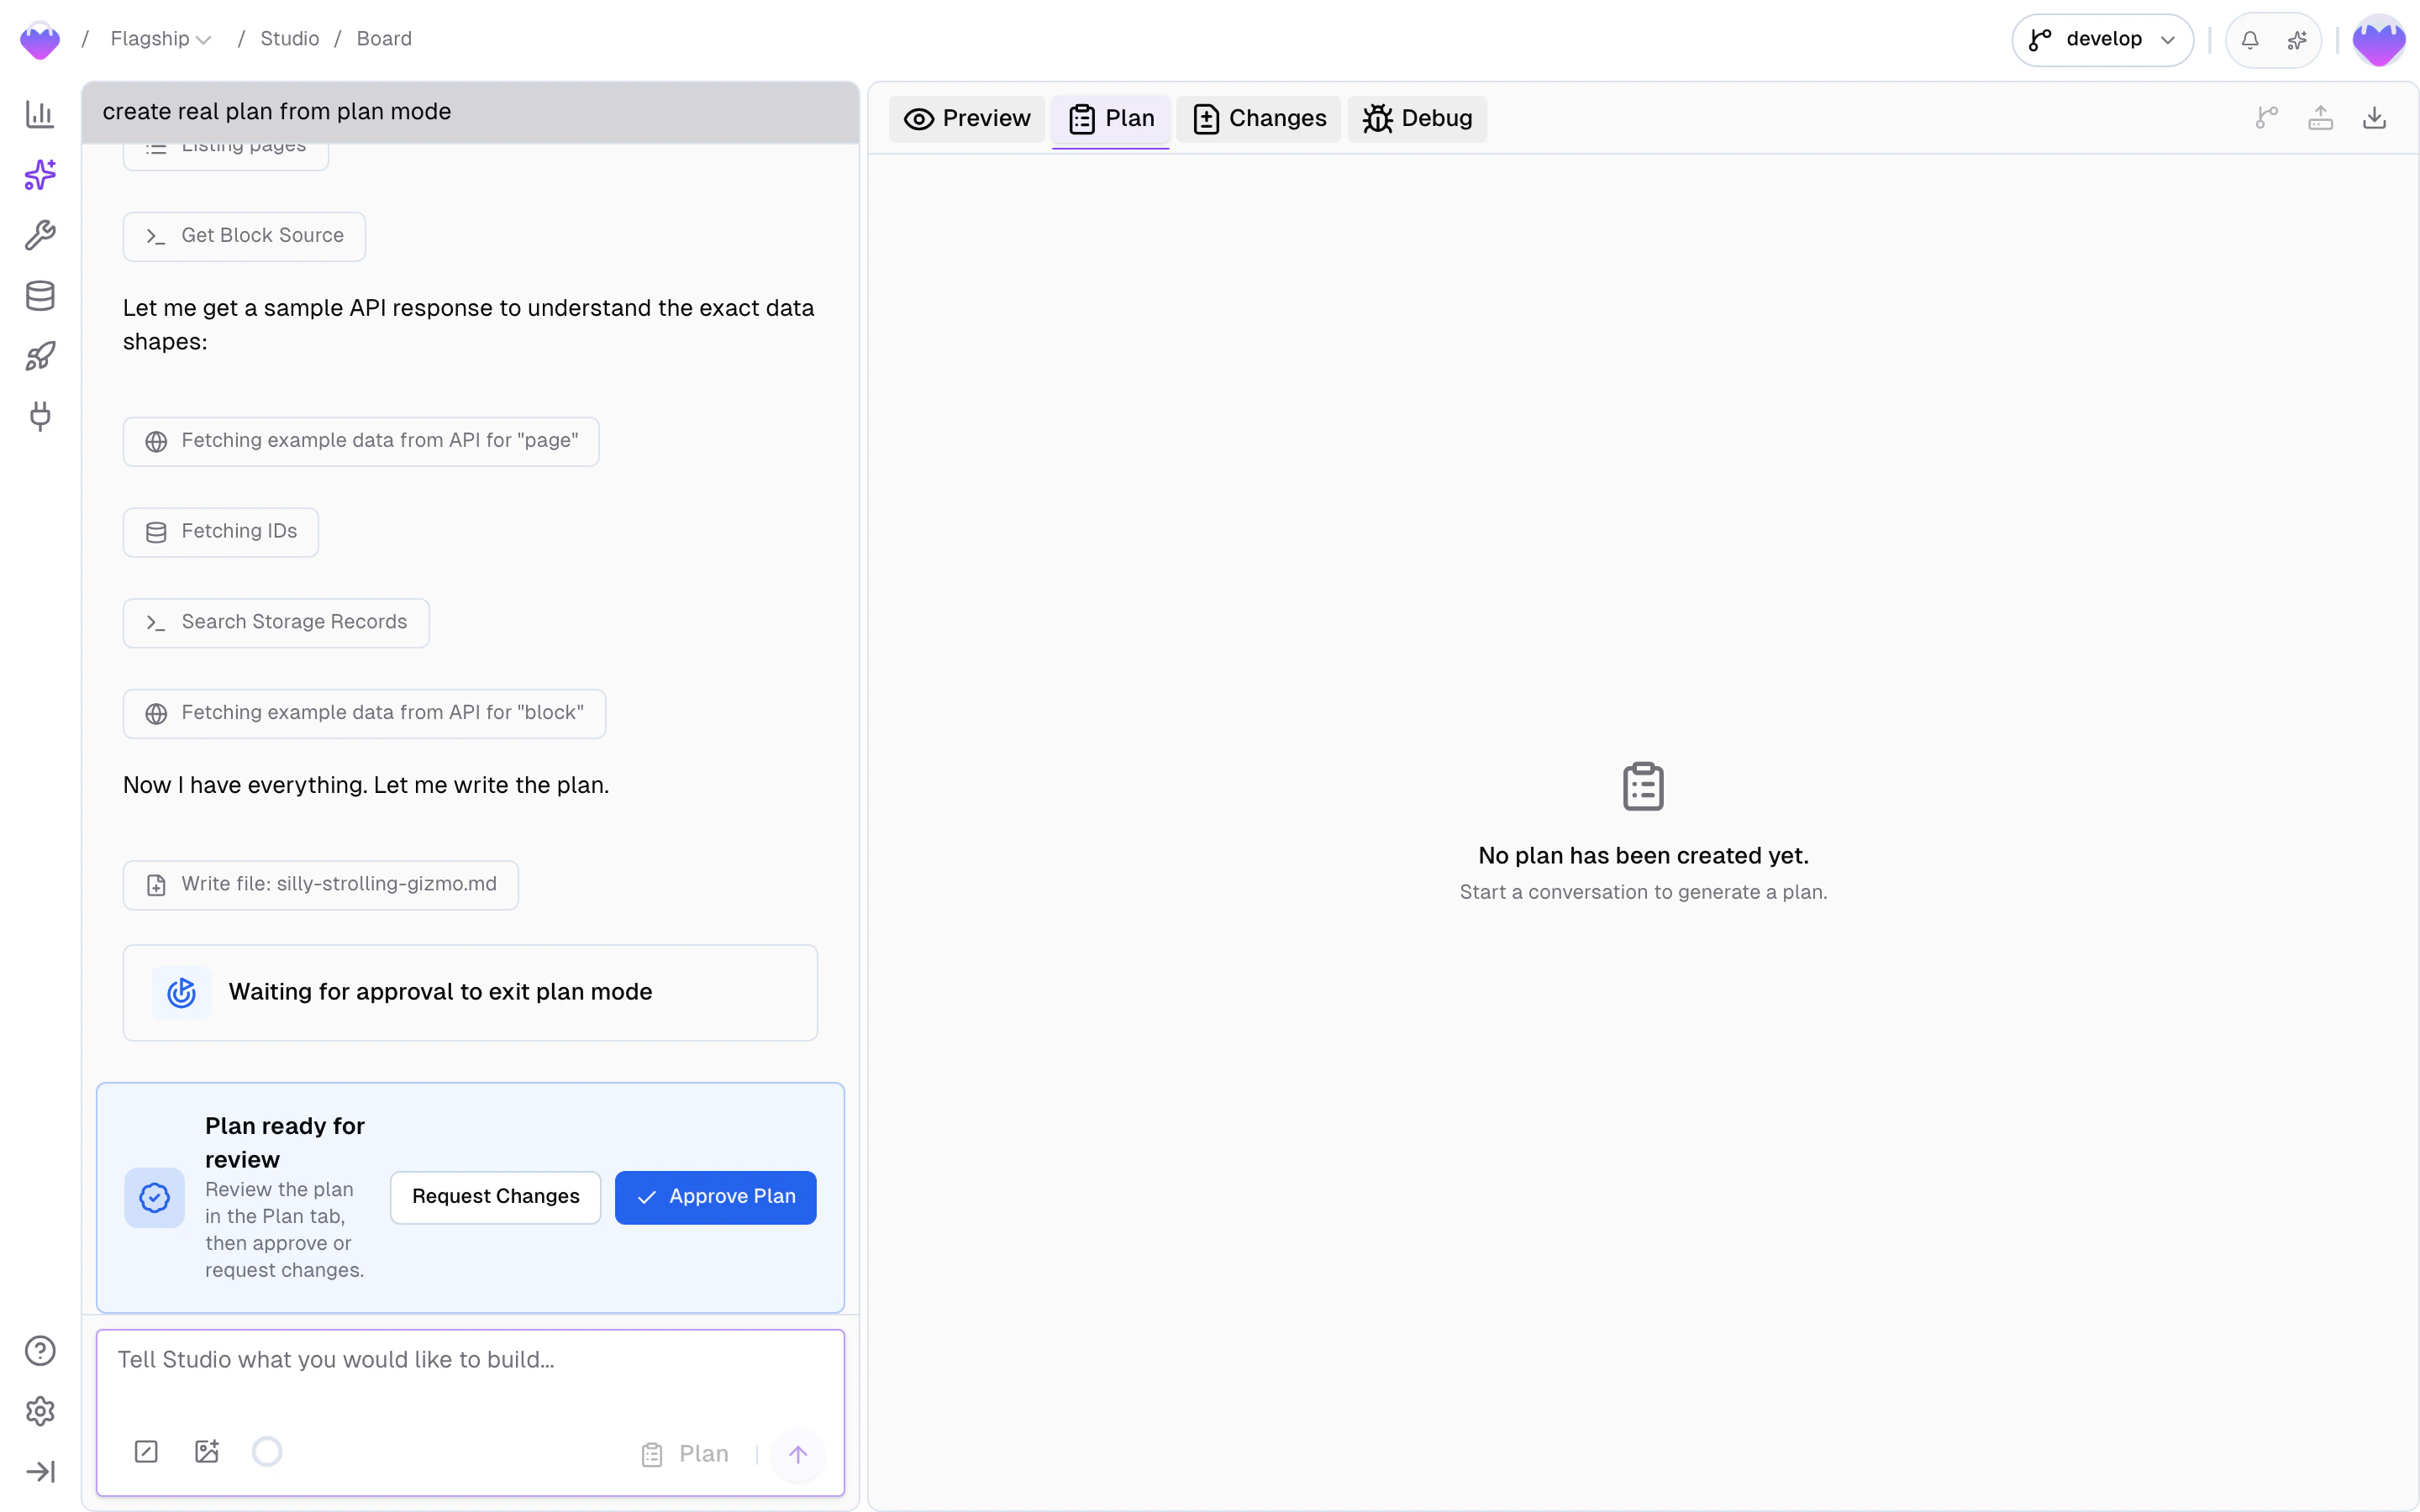
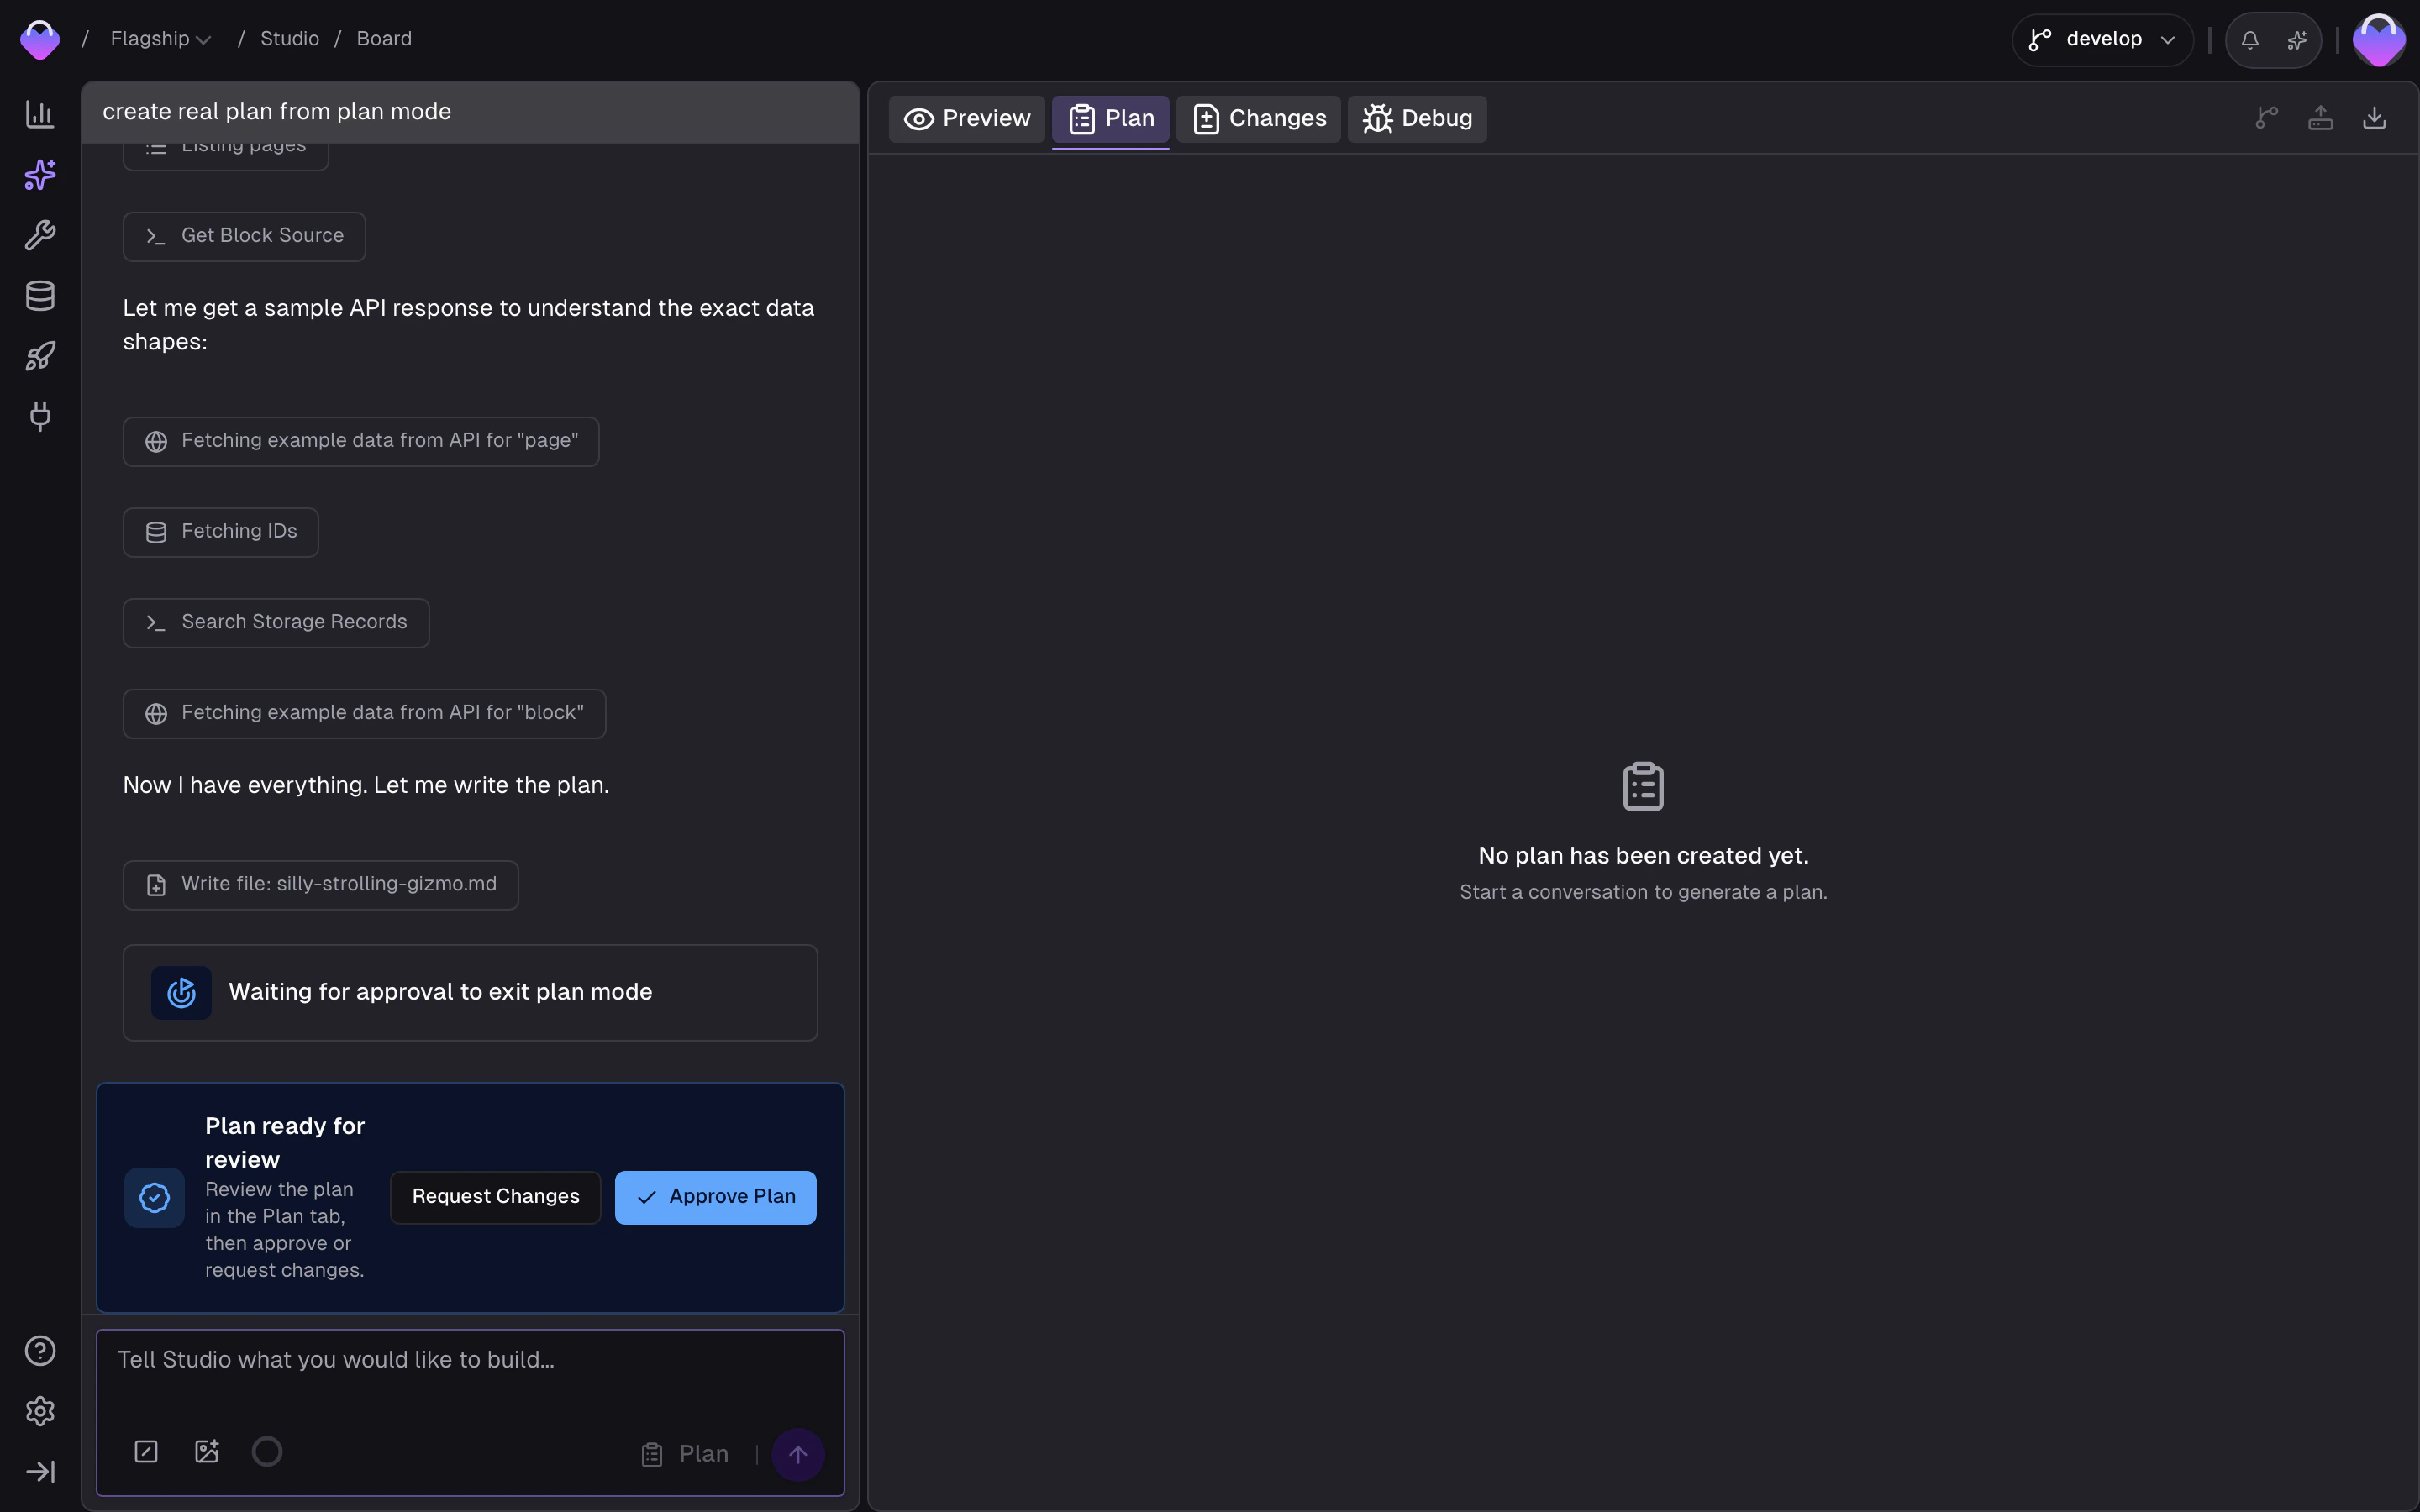
Plan mode is a formal approval gate for the Studio chat. When it’s on, the agent writes a plan describing what it intends to do — the approach, the files it’ll touch, the stack tweaks if any — and waits for you to approve before making a single change. Useful when the cost of catching a misunderstanding after the fact is high. Studio starts every job in Build mode by default: the agent writes code directly and you review via Preview and Changes. Switch to Plan mode from the workspace toolbar when you want the agent to stop and check in before acting. The agent also enters Plan mode on its own for complex work — multi-file refactors, a feature cutting across frontend and stack, anything where scope should be clear up front.Approval flow
The agent writes a plan
A Markdown plan file appears in the Plan tab of the workspace —
usually the approach, the files it’ll touch, and any open questions.
When to use it
- Multi-file changes or refactors where scope should be clear up front
- New features that cut across frontend code and stack config
- Work you’d normally write a ticket for anyway
- Anything where catching a misunderstanding in review would cost more than catching it in a plan
When to skip it
- Small tweaks — a CSS change, a copy fix, a variable rename
- Iterations on work the agent already has approved plan context for
- Quick prototypes where moving fast beats tight planning
- Questions and read-only investigation — the agent isn’t making changes, so there’s nothing for Plan mode to gate
You stay in control
Studio is agent-driven, but nothing reaches production until you deliberately ship it. Changes happen in a sandboxed workspace against a feature branch; the agent pauses for a tool approval before each step (with a Skip approvals toggle when you want it to run uninterrupted); the live preview lets you see the result before anything leaves Studio; pull requests run through your team’s normal review; and Release Control decides when the stack-side changes move fromdevelop to public. You can drop out at any point and continue the work in your editor — the branch is a real Git branch, clone and keep going.
Related
Workspace
The Preview and Changes panels, and how to review a job before
committing.
GitHub Integration
Connecting GitHub, commit and push mechanics, opening a PR.
Context Base
How Skills, Rules, and Commands shape the Studio chat’s behavior.
Your first feature
Walk through a complete Studio job end-to-end.