Define storages
You can create a new Storage by clicking the New Data Storage button in the Data Storages section of the admin app.If you work from an IDE agent workflow, you can also create storages with the
create_storage MCP tool. See the Frontic Tools reference for the tool parameters and follow-up schema workflow.Create a new storage
Start by defining a name and selecting a schema type. The type specifies specific features that are available for the storage.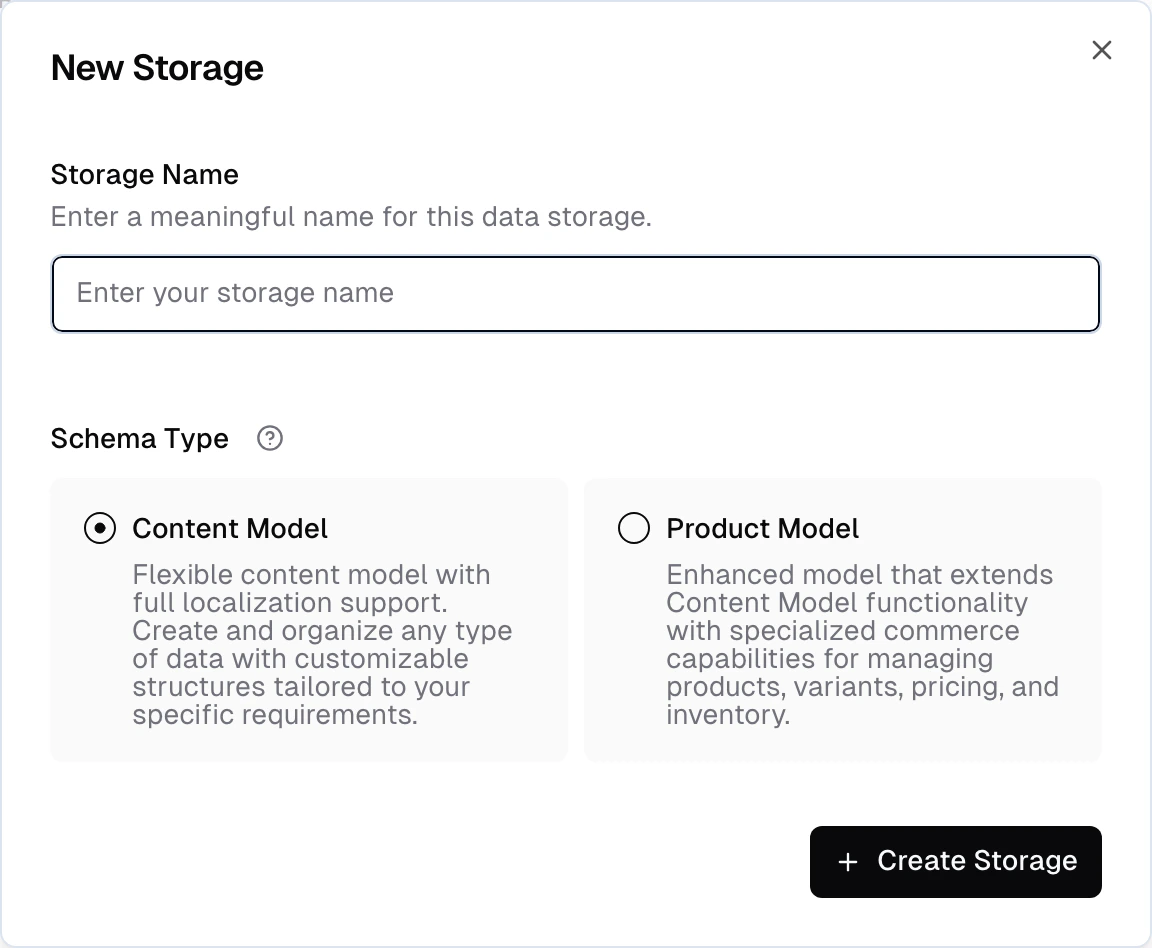
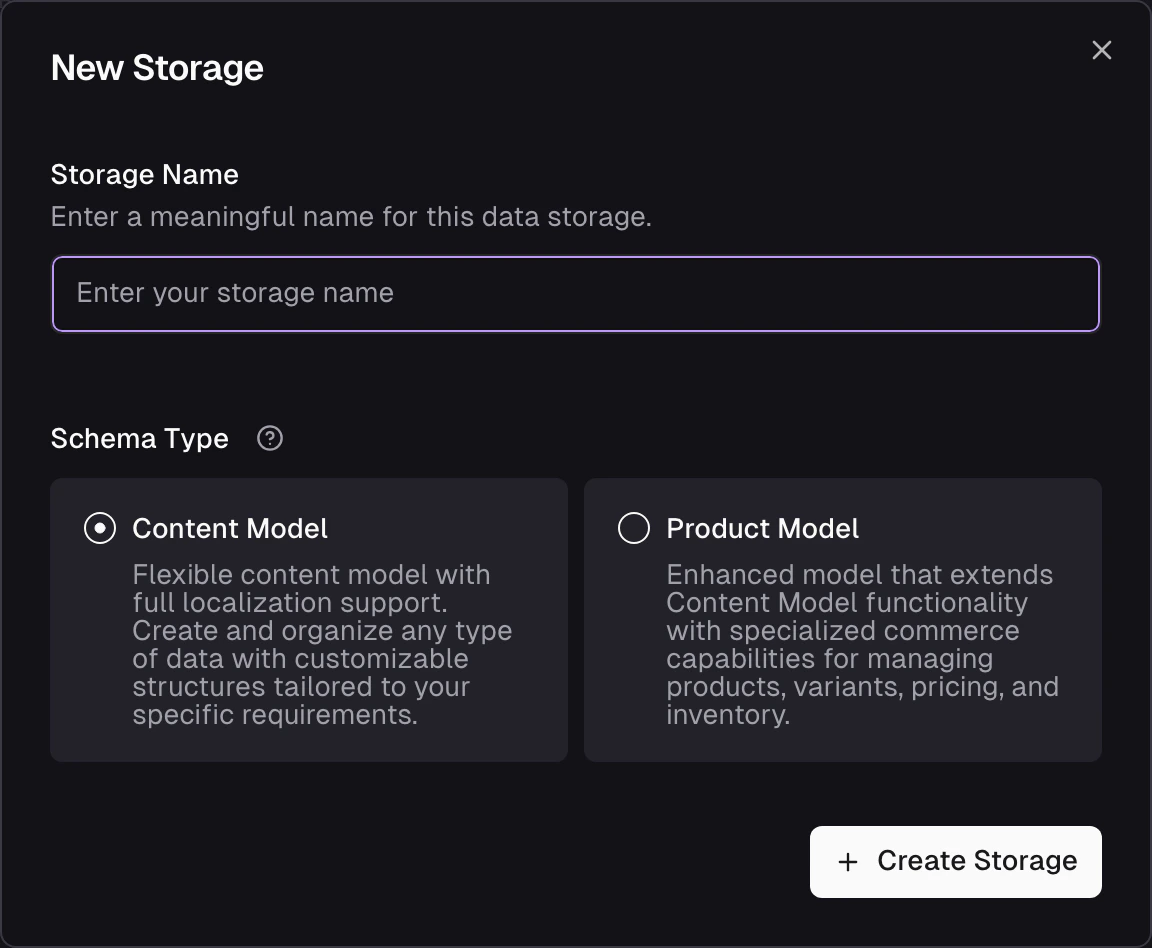
| Type | Description |
|---|---|
| Products | Designed for storing product data, including structures like variants and prices. |
| Content | Used for storing all other types of data. |
key— unique identifier for the recordactive— boolean to enable or disable a record
options— a list of options that define the variant (e.g. color, size)price— the variant’s priceparentKey— links each variant to its parent product
Add fields
Add additional fields to a storage by clicking the Add Field button. You can select from a variety of field types, each with its own properties and capabilities. Refer to the Storage Field Types Reference for an overview of the available field types. Additionally, for each field you can configure the following:- Name - the internal name of the field
- Description - a description of the field that will make it easier for others to understand the purpose of the field
- Array - whether the field is an array. Array fields can contain multiple values of the same type.
- Translatable - whether the field is translatable. Translatable fields can have different values for each language.
- Scoped - whether the field is restricted to a specific scope. Scoped fields can only be used in certain contexts.
- Shared Across Variants - whether the field is shared across variants. Shared fields will have the same value for all variants of a product.
Mapped fields
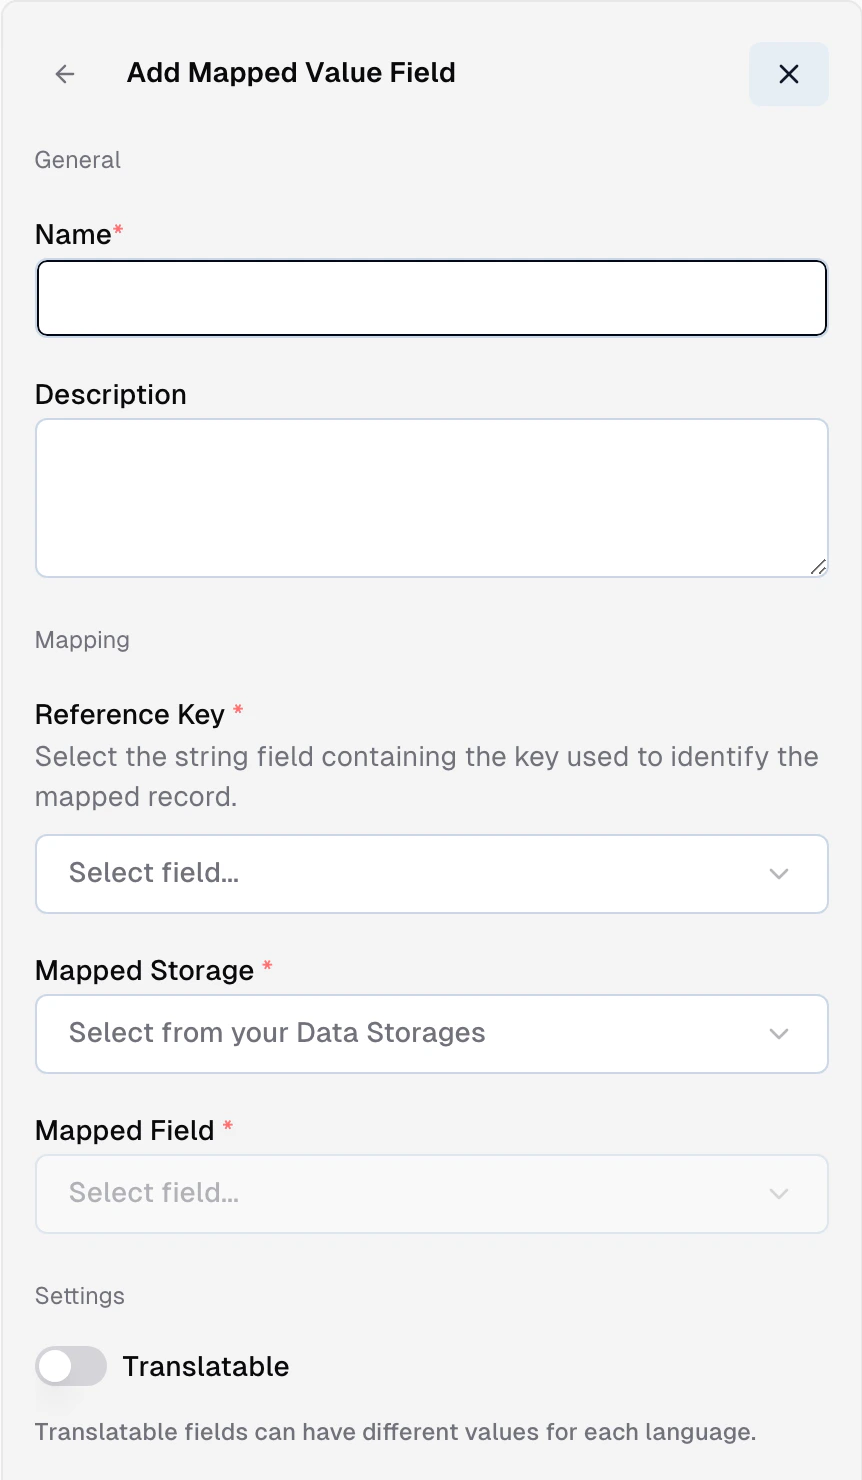
A mapped field is a storage field whose value is resolved from another storage when a record is returned by the API — you define a lookup and the field appears on the response as if it lived in the record directly. Useful when two storages share a key and you want the values to stay in sync without duplicating them into the sync step. In the admin app, add a field and pick Mapped Value from the Special group. You configure four things:- Target storage — the other storage you’re pulling from (e.g.
Brands). - Target field — the field on the target storage whose value comes back (e.g.
Brands.name). - Source field — the field on the current storage used as the lookup key (e.g.
Products.brandId). - Paths (optional) — dot-path into a composite on either side when the match or the value is inside a composite structure.
Brands and every product using that mapping reflects the change on its next response.
| Storage | Field | Purpose |
|---|---|---|
Brands | id | The brand identifier (target field) |
Brands | name | Display name, the value you want to read |
Products | brandId | Reference on each product (source field) |
Products | brand | Mapped field — returns Brands.name where Brands.id = Products.brandId |
brand: "Nike" (or whatever resolves) without that string living in the Products storage.
Constraints worth knowing:
- A mapped field’s source can’t itself be a mapped field — chained lookups are blocked. If you need “A → B → C”, flatten the hop (add a direct A → C lookup, or populate the intermediate value during sync).
- Mapped fields resolve when the response is built, not at sync time. If the target storage is empty or the lookup doesn’t match, the field comes back null.
- A field that’s marked as a mapped field can’t also be populated by a sync or a computed value — the mapping is the single source for that field.
Option fields
The built-inOption composite stores product options like color, size, or material. Each item in the array has an attribute (the option key), a value (the specific choice), and a label (the display name for the attribute):
Sorting fields
The built-inSorting composite enables parameterized sort orders — for example, category-specific product positioning. Each item has a key (matching a listing parameter value, like a category ID) and a position (numeric):
key, and items are sorted by the corresponding position. Products without a matching key are placed at the end.
Mock data
If you don’t have a data source connected yet — or want to test your API surface before real data arrives — you can generate mock records directly on any storage.Per-field mock settings
When adding or editing a field, expand the Mock section to configure how test data is generated for that field.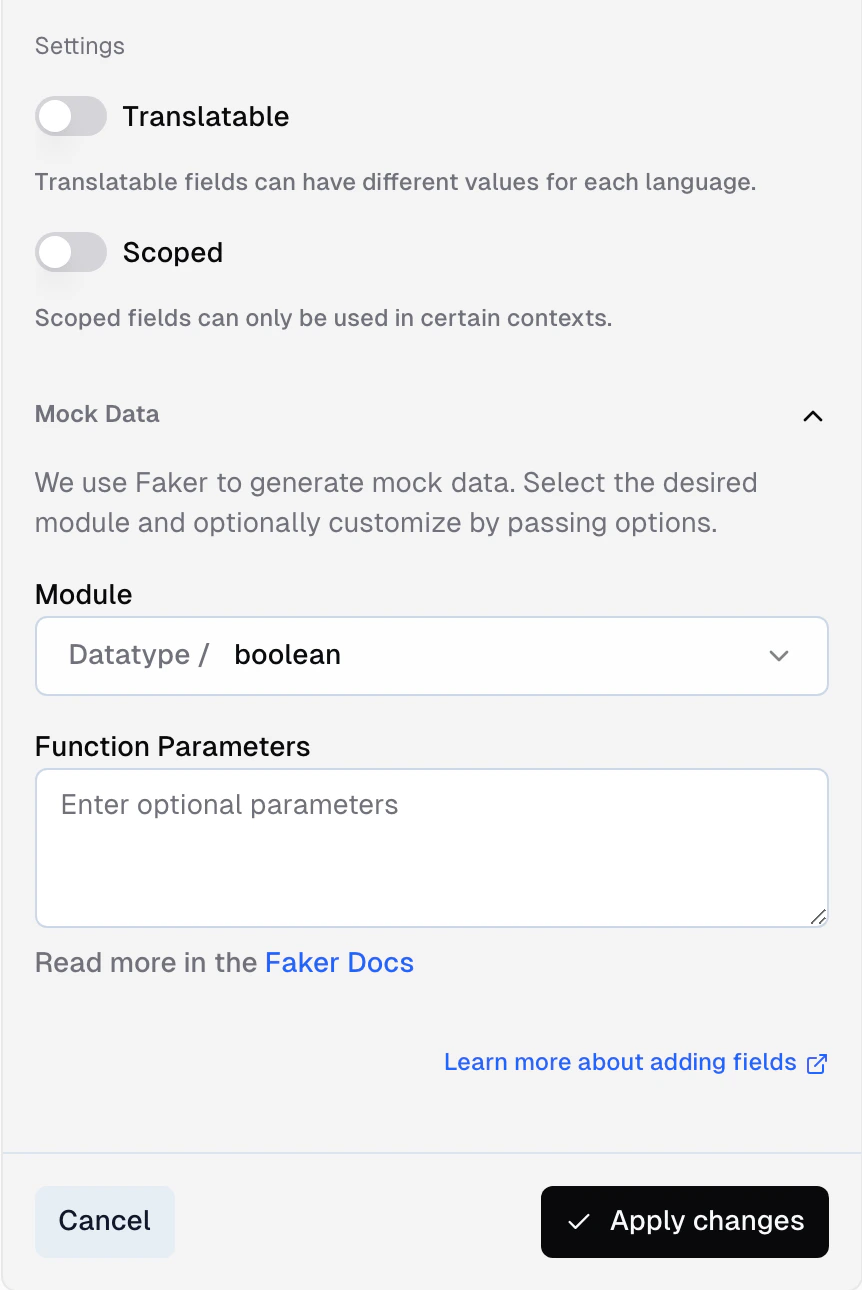

commerce.productName, image.url, number.int) that produces realistic values. For numeric fields, set a min/max range. For array fields, set how many items to generate.
See Faker.js for the available modules and configuration options.
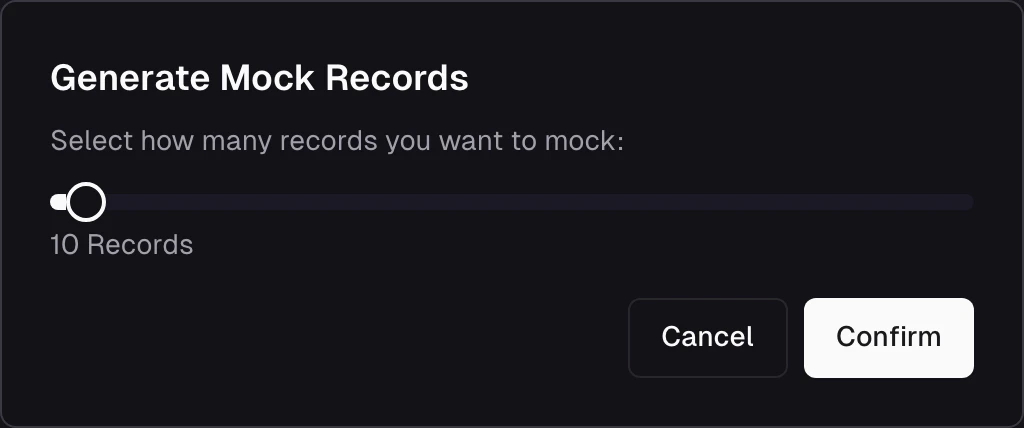
Generate and remove mock records
From the storage detail page, click the menu and select Generate mock records. Choose how many records to generate (1–500) and Frontic fills the storage with test data based on your field mock settings.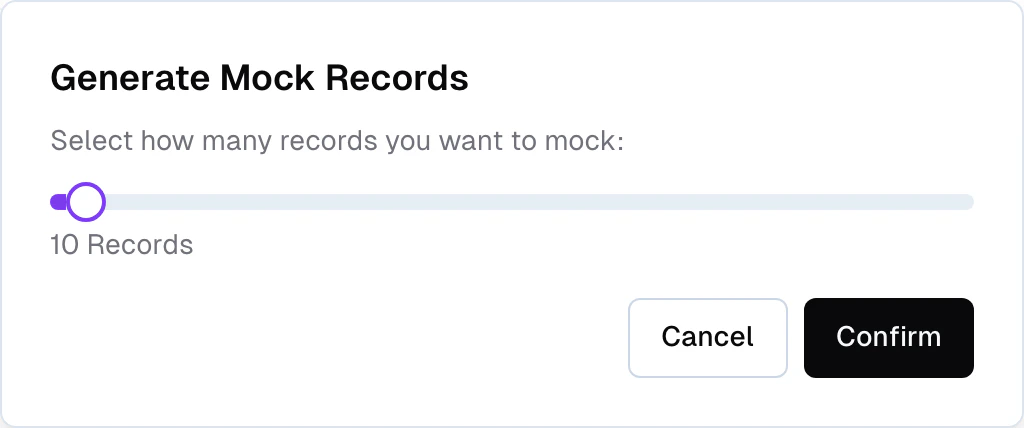
Populate a storage
A storage starts empty. To populate it, connect it to a Data Feed through a Data Sync — the layer that maps and transforms feed records into storage records.If you haven’t set up an integration and data feed yet, start with the Ingest page first.
Connect a data feed
Click Connect on the right side of your storage view to start the process of connecting a data feed.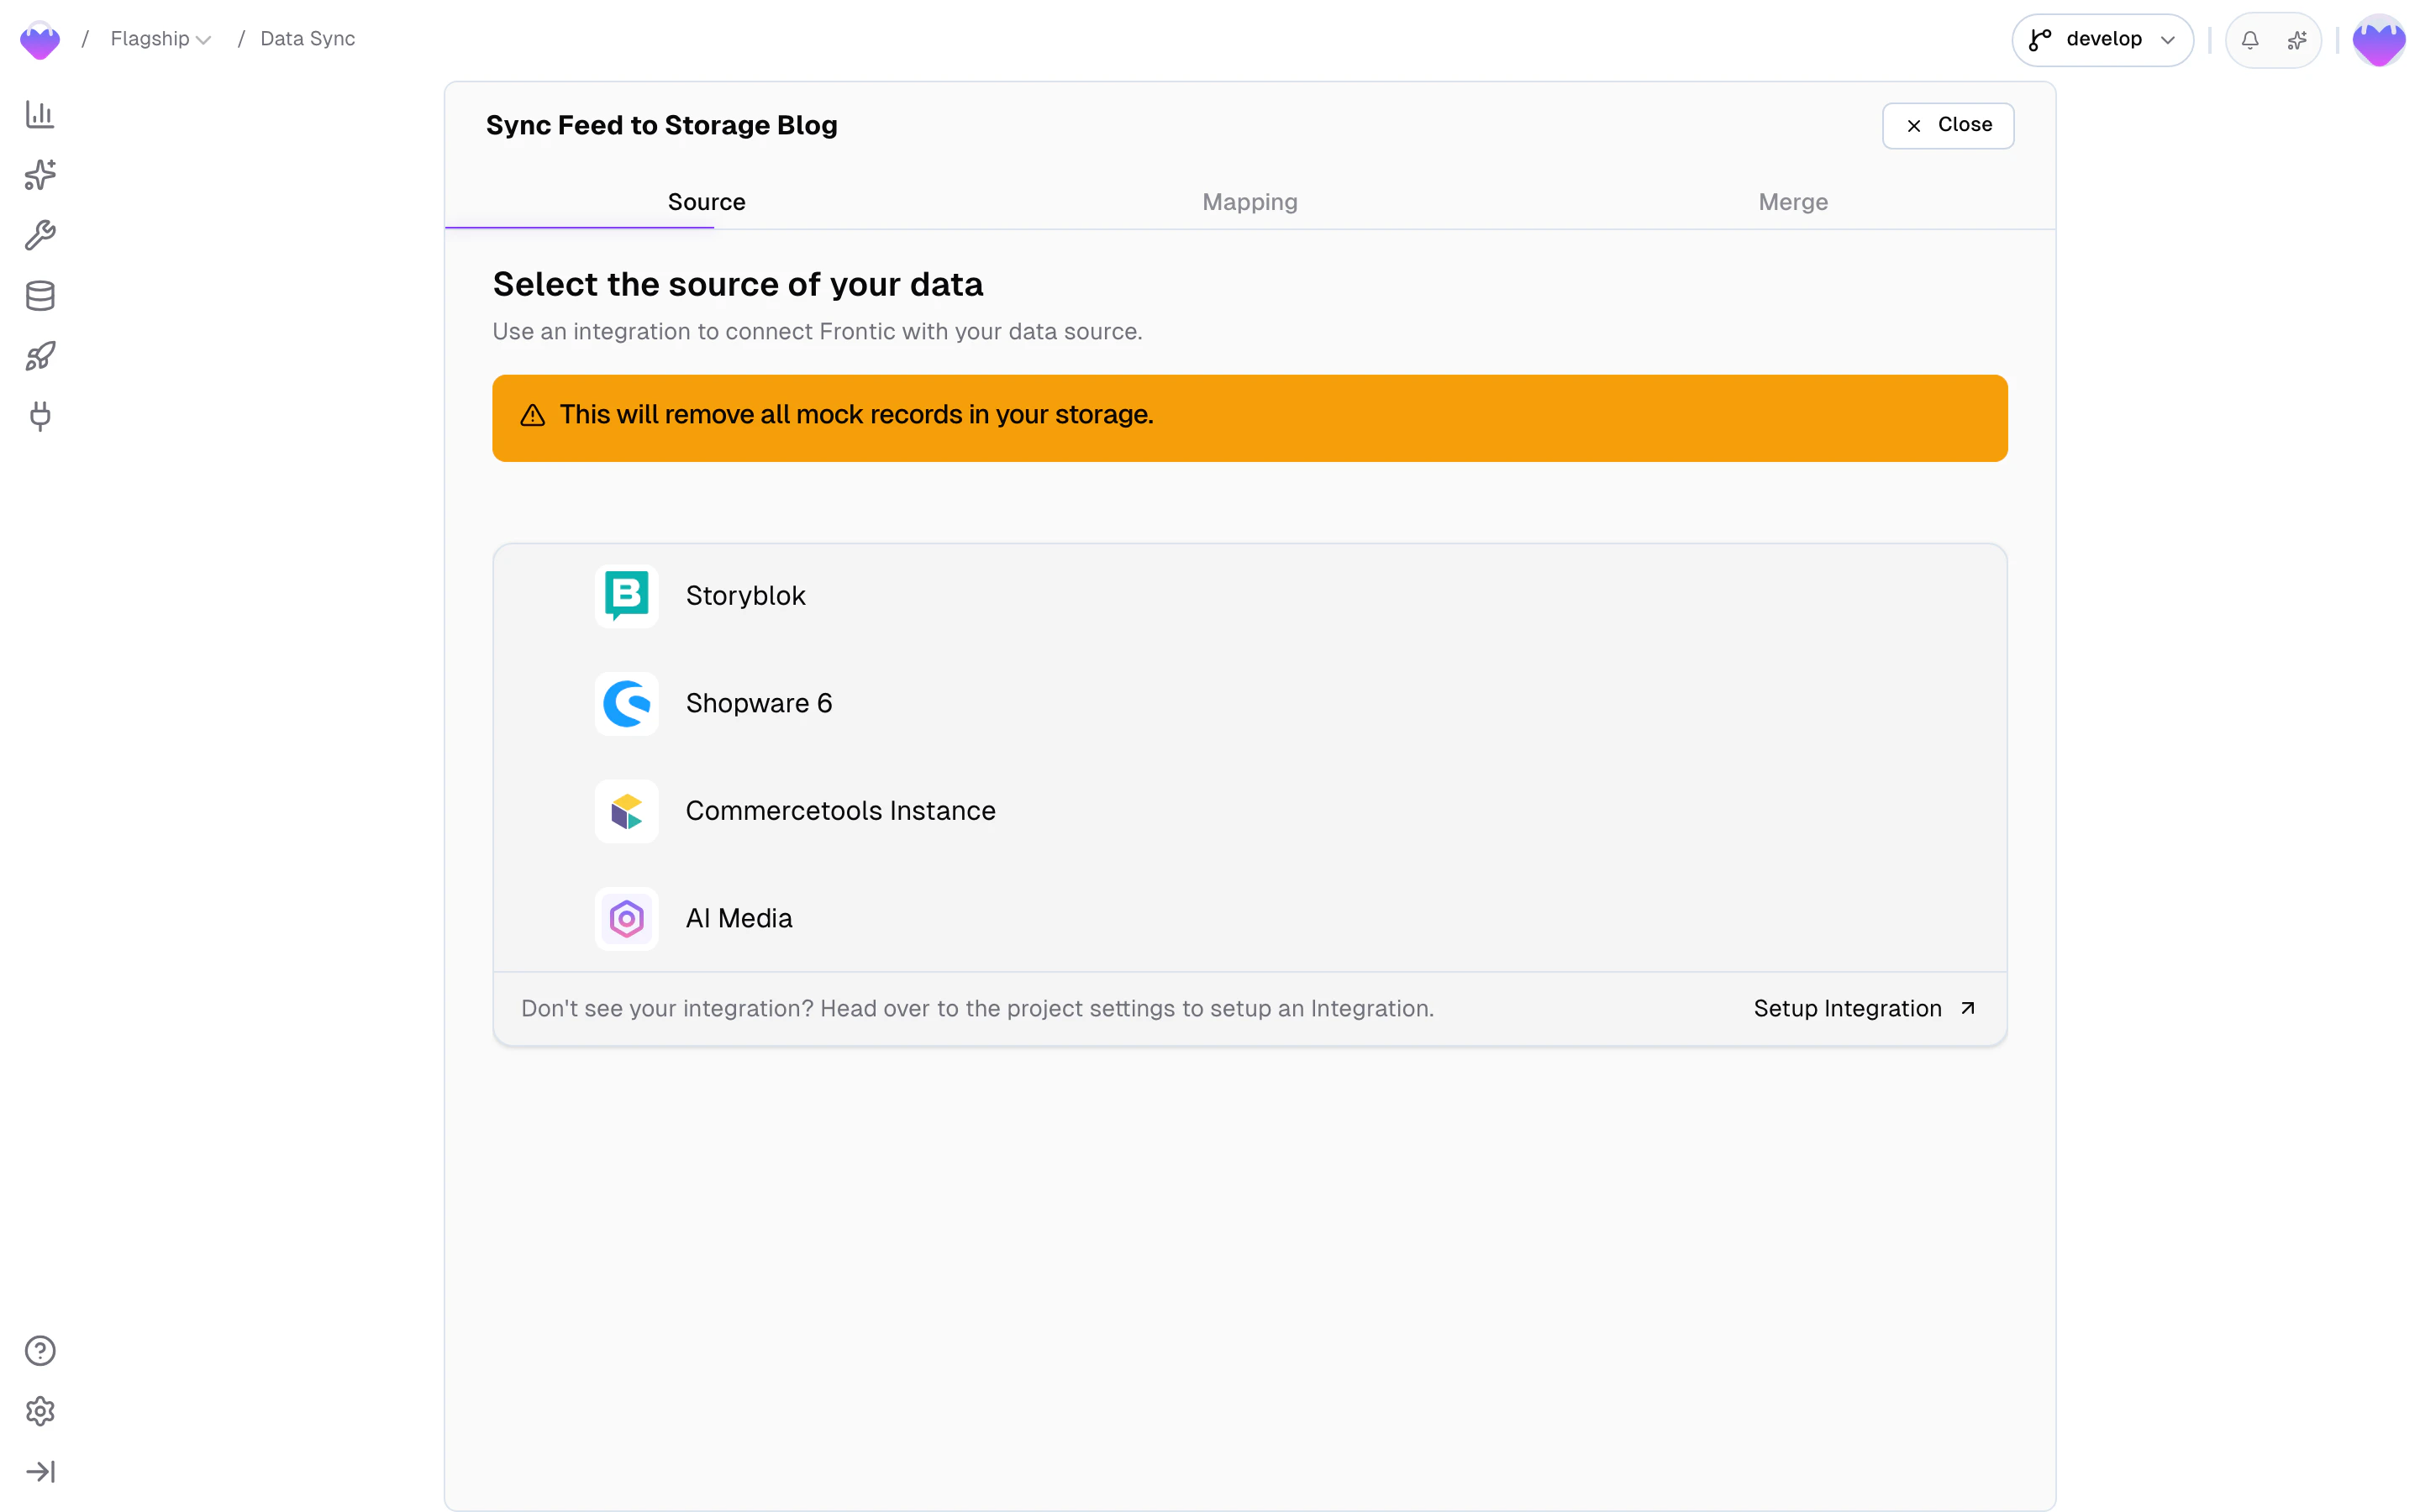
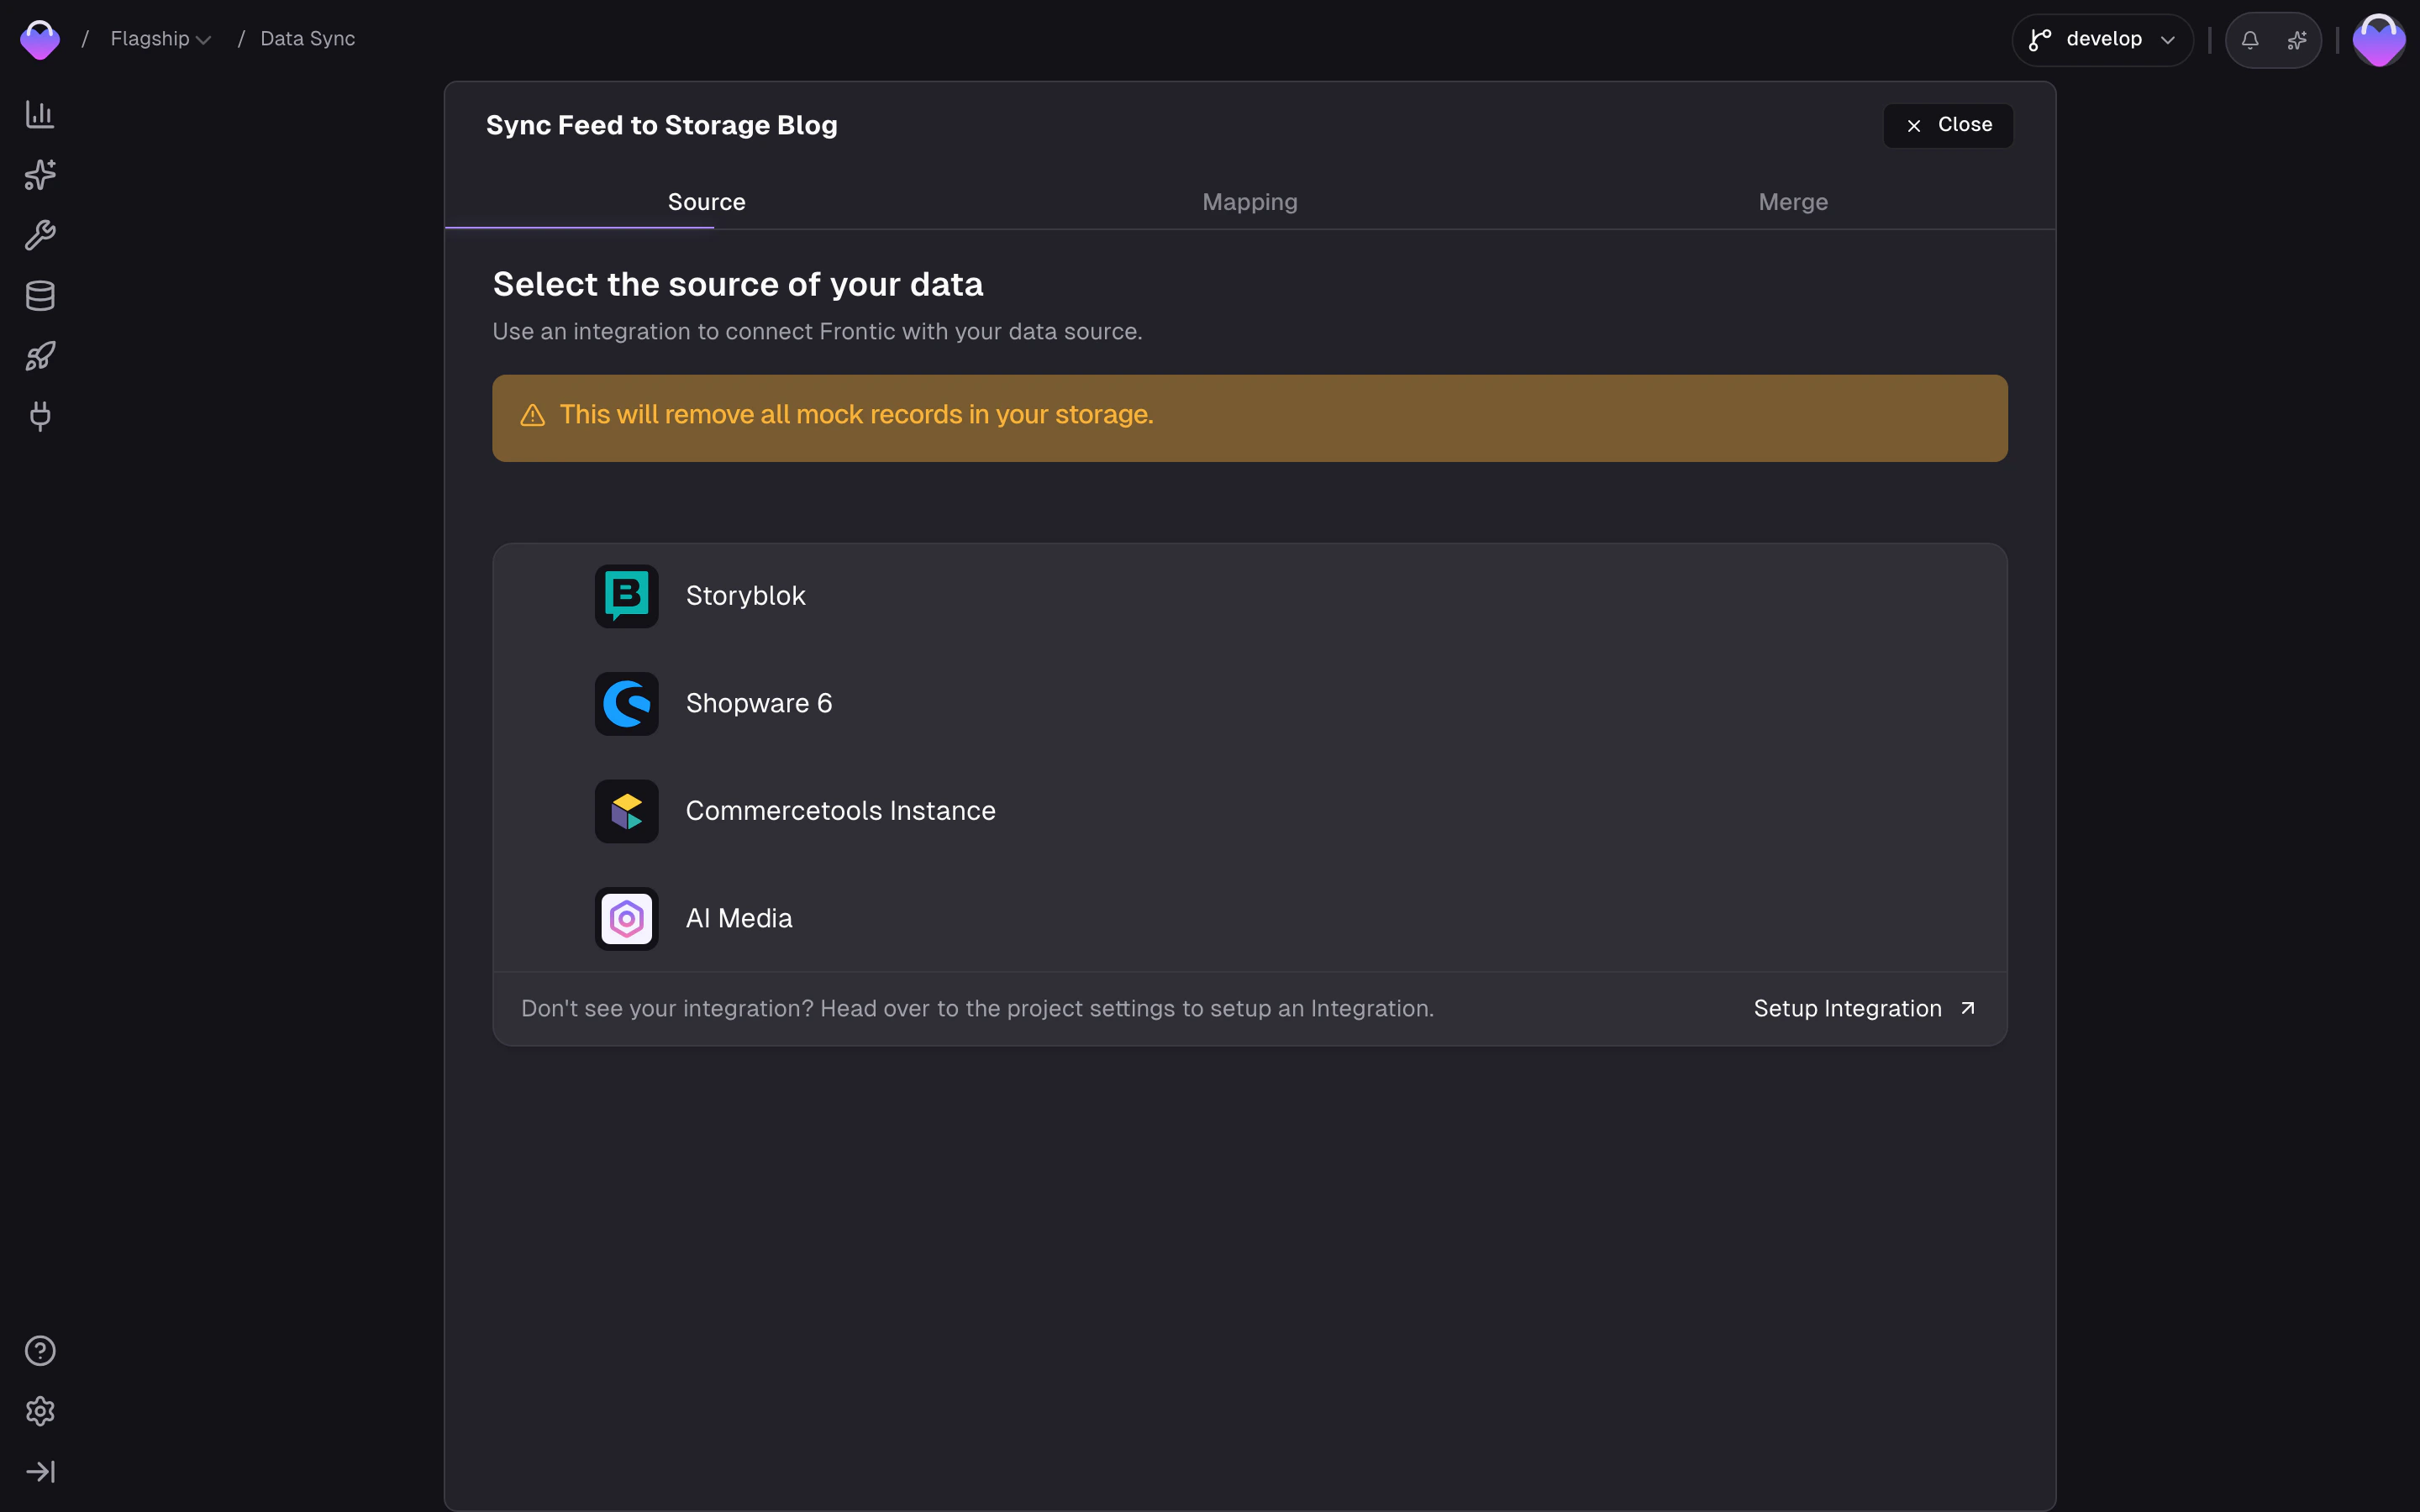
Data Syncs — including which feed a storage connects to and how fields are mapped — are covered by Release Control. Changes to a sync don’t affect the public API version until you publish a new release. The feed itself stays live across all stages, so new data keeps flowing while you refine the mapping in develop.
Configure the data sync
The wizard walks you through two mapping steps:- Channel → Scope mapping — map the integration’s channels to your project’s scopes, and within each scope, map the integration’s translations to your project’s locales. This tells Frontic which source content belongs to which market and language.
- Field mapping — for each storage field, define how it gets its value from the feed. Each slot operates in one of four modes: Schema Field (directly from a feed field), Computed Value (transformed through the Value Composer), Static Value (a fixed value), or Keep Empty.
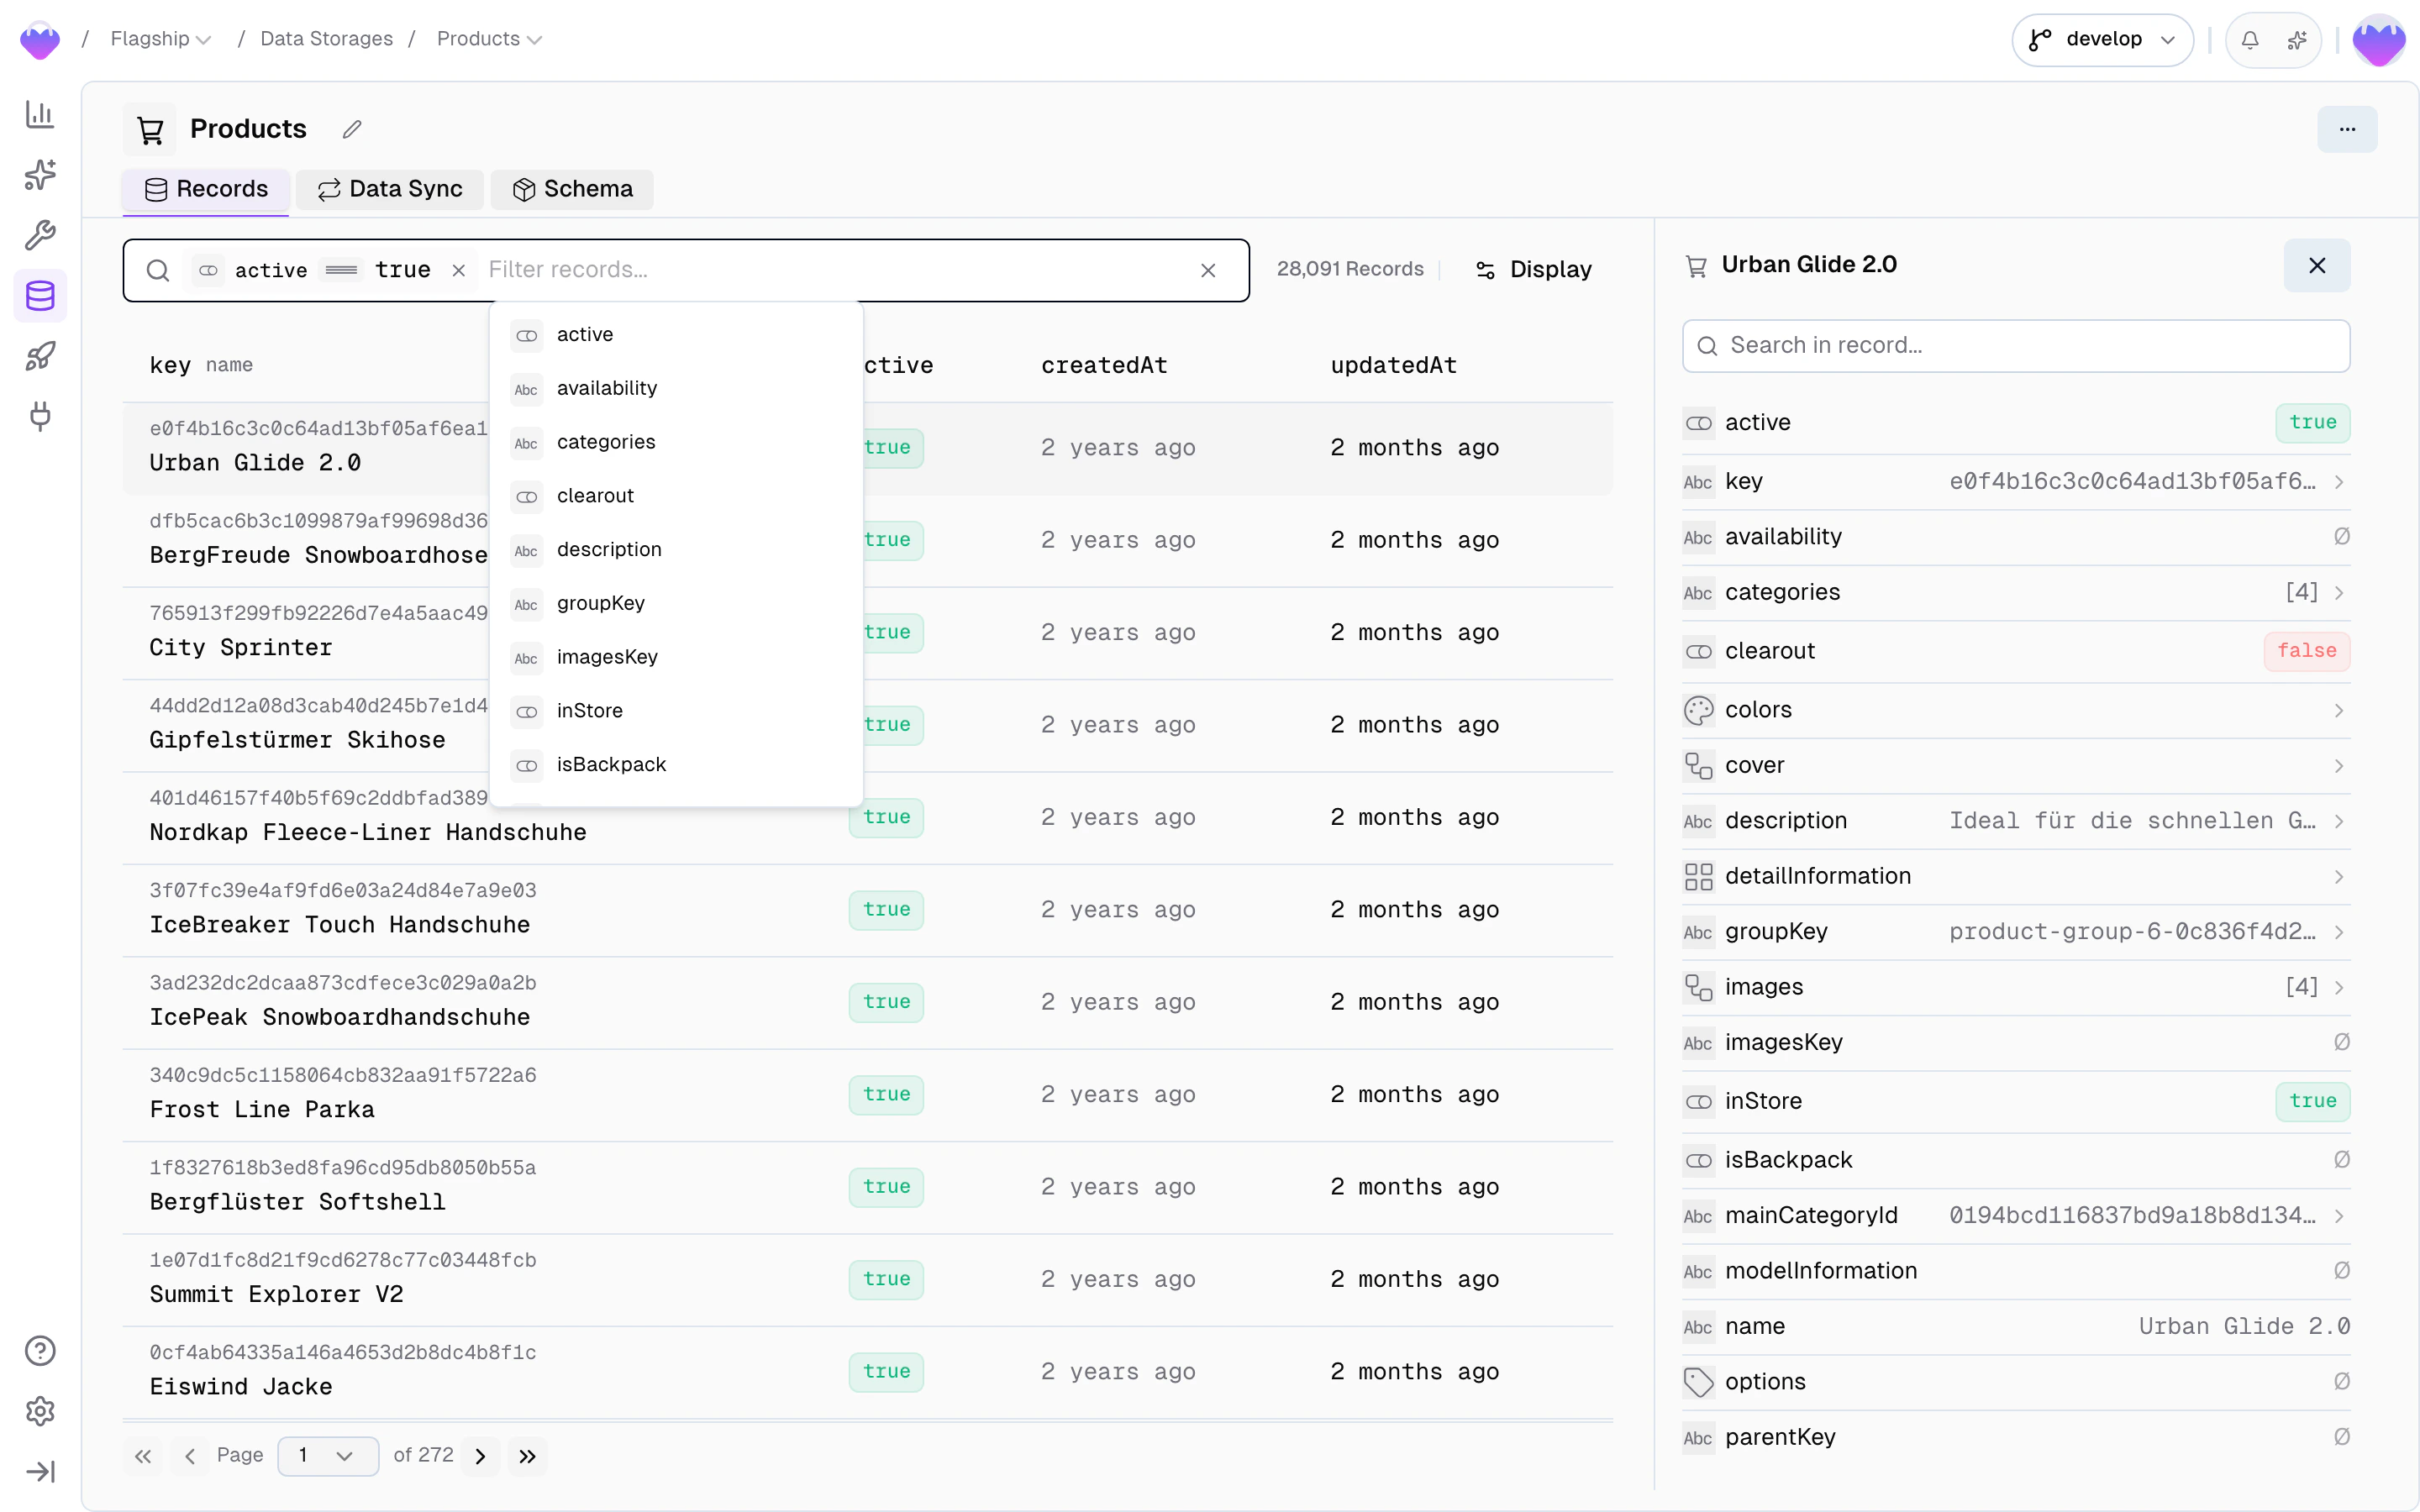
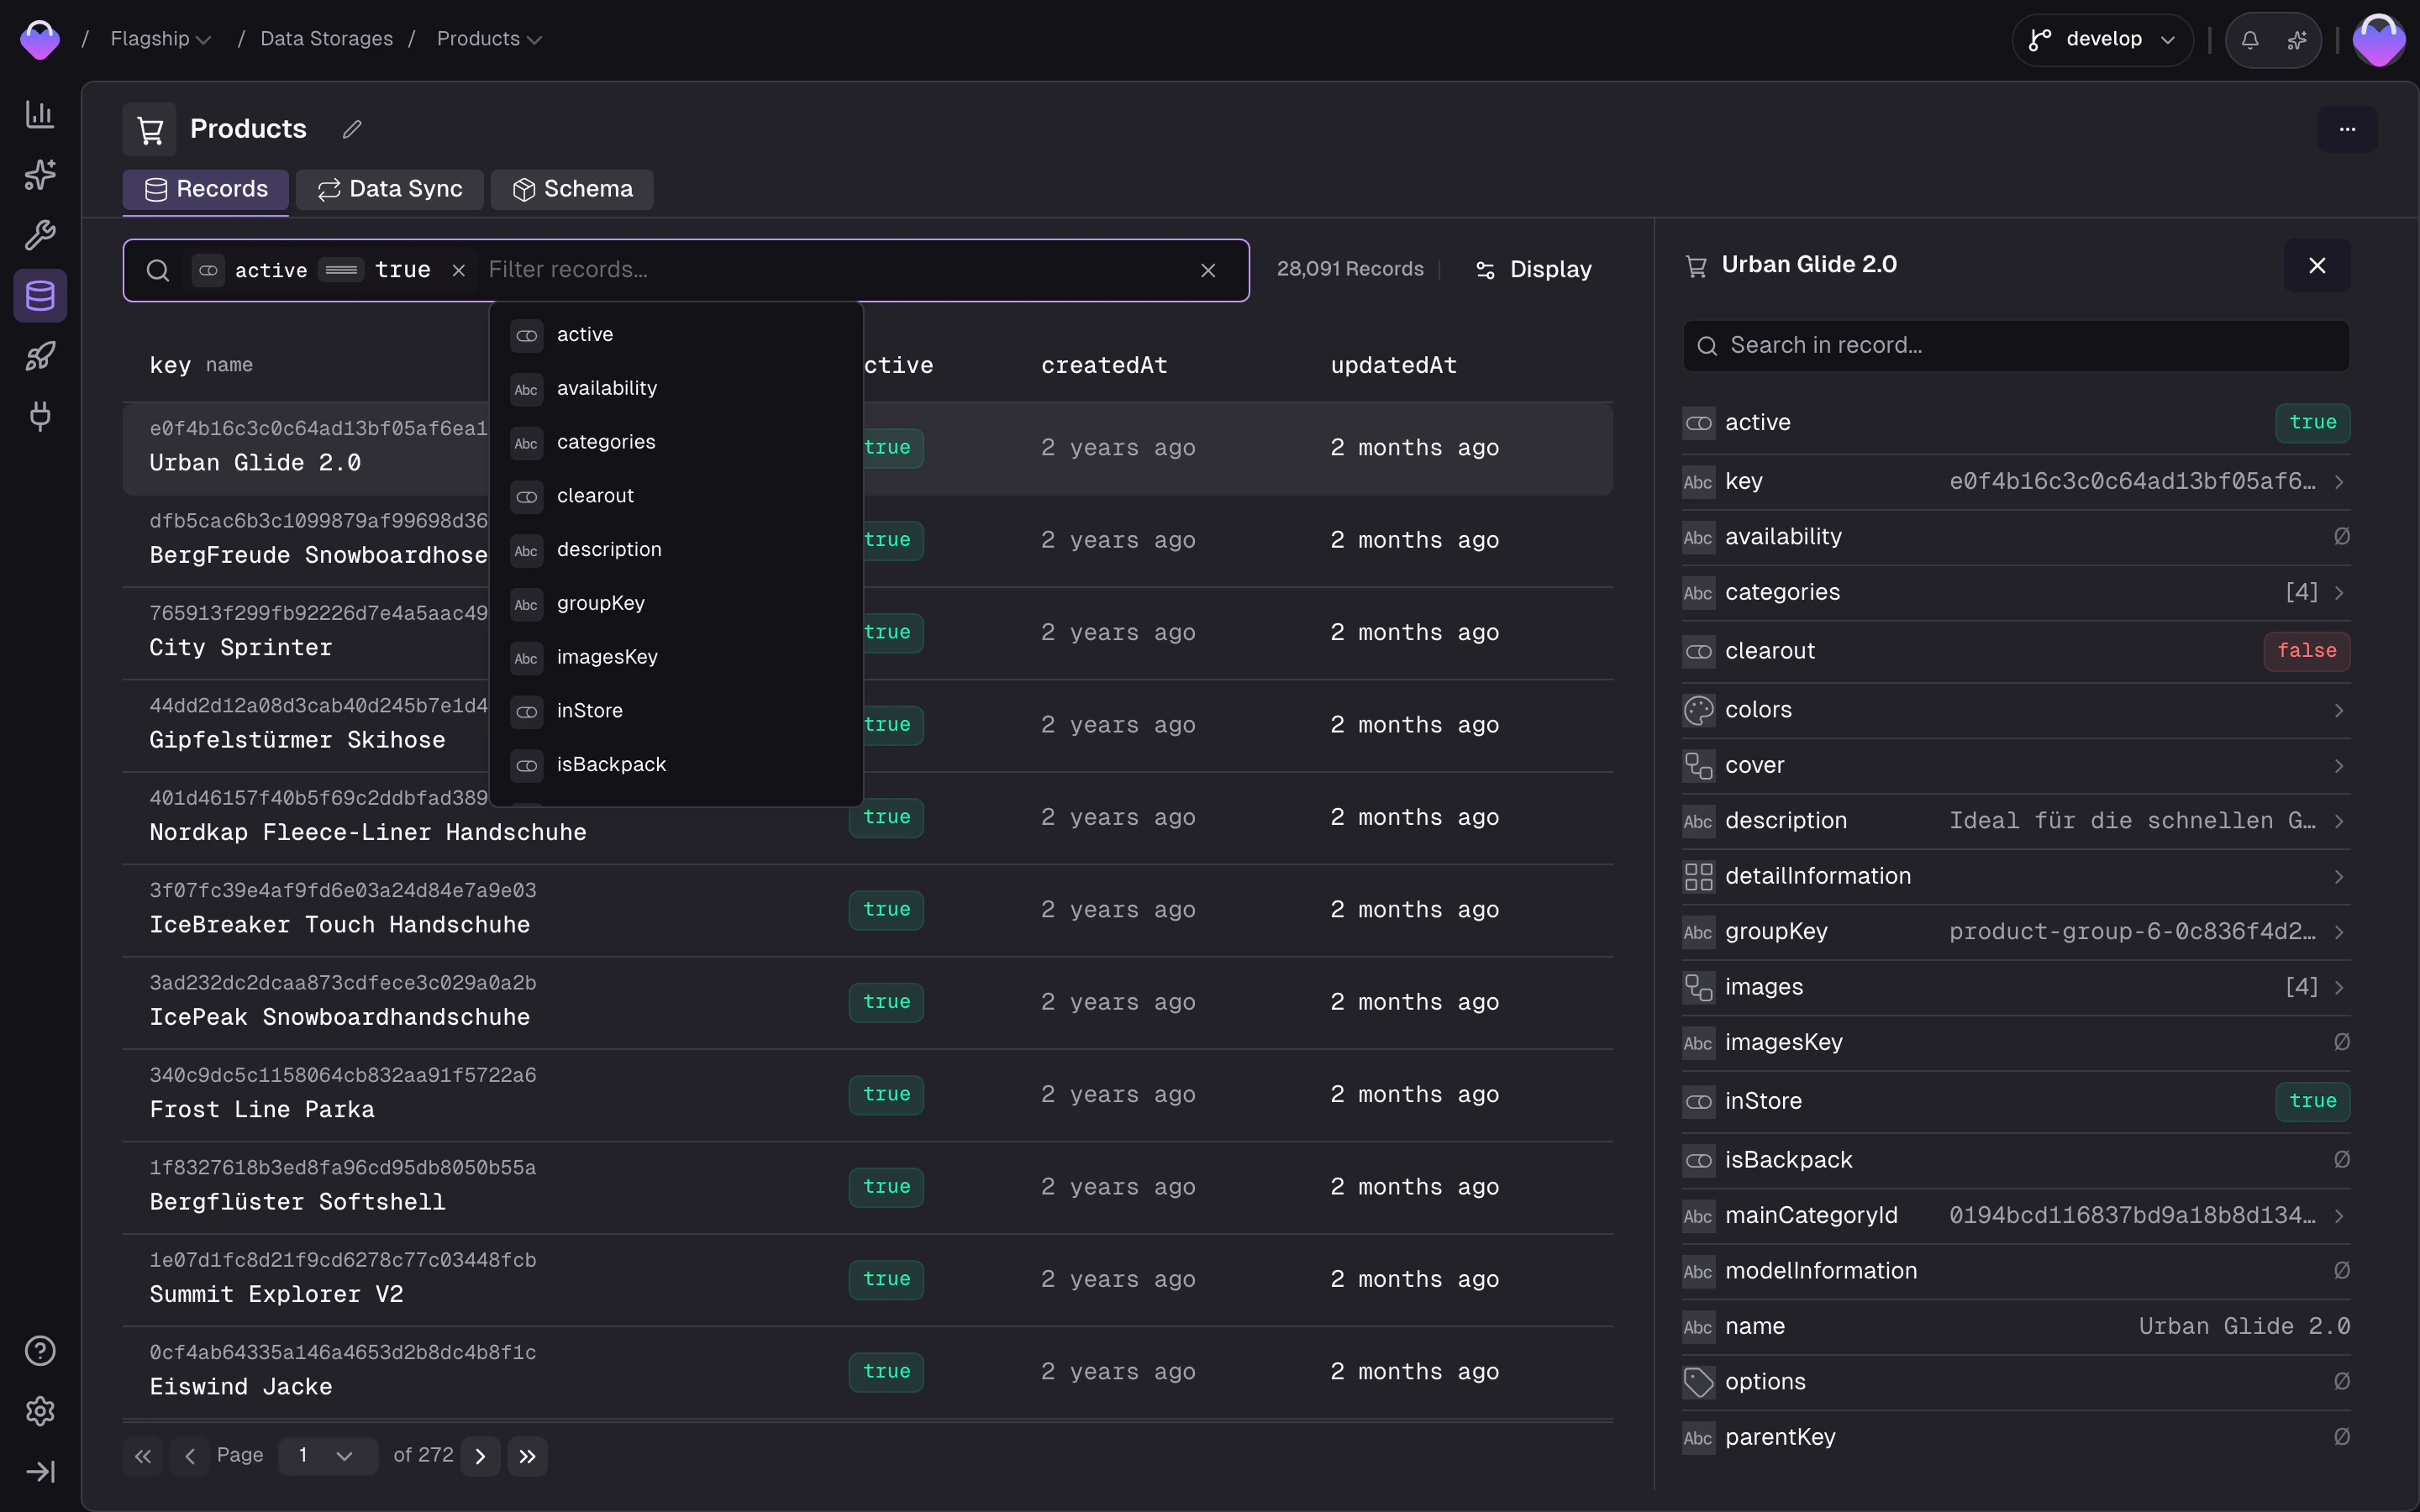
Browse storage records
Once records are flowing through the data sync, the storage’s Records tab lets you browse and inspect your data:- Filter by any field — click the filter bar to open a field picker that lists every field on the storage. Pick a field, choose an operator (
equals,contains,is empty, …), set a value, and the list narrows down. Stack multiple filters and toggle between match all and match any to drill in further. - Switch locale and scope to see how translations and scoped values resolve
- Inspect individual records — view every field value, see which feed record it originated from, and check when it was last updated
- Filter by product or variant in product storages to navigate the parent/child hierarchy